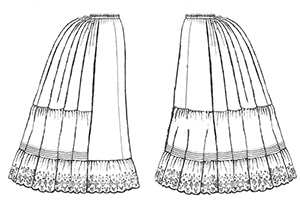
This was a nightmare of a costume to make. Bit of background - these costumes were made for a game at a role-playing convention, yes it has crossed my mind since that it was a lot of work for 3 hours of use but that aside. In addition to all the Victorian costumes I was also making all these pirate costumes (that were worn for the 4 days).
I did get a lot of help from the lovely ladies but I was at the time the primary sewist. Stacey was the second and so she made her pirate outfit and was also going to make her Victorian. Pirate went off without a hitch but Victorian was presented to me the afternoon before con, the self drafted underskirt complete and the Wash over skirt mostly complete but the bodice was simply pieces.
Now remember when I said that TV had the best sizing system ever - well Stacey did not listen to me and had decided she would need the largest pattern size and thus traced and cut that out. So Yeah, perhaps a post on perception v's reality may be in order some time. Anyhow we were up until about 4 or 5am getting this completed a task made all the more fun by Stacey's bizarre ability to stab herself with any pin post about 3am to which the sewing hours after that became known as stab o'clock.
I won't break this one down as I did the last ones because as I have already mentioned I didn't sew a lot of it. From what I can tell the Wash Over skirt sews together well looks great and is easy to deal with in terms of cleaning and storing. The whole skirt flattens out for ironing and cleaning. what I will focus on is the bodice.
We changed up the sleeves (to make it easier at stab o'clock) and changed the neckline quite substantially. I was especially proud of having lined up the chevron despite the resizing stress. I assume it would have sewn together much better if the proper instructions were followed from the start. Lucky I had some practice with the whole resize thing on my own bodice so it wasn't completely foreign though I would still only rate myself novice at best.
Anyway there is now only one Victorian to go but alas I will need to get a better picture as the one I have is only from behind.
Showing posts with label costumes. Show all posts
Saturday, February 11, 2017
Wednesday, February 1, 2017
A Look at my Victorian Past Part 4 - Pam's Ensemble
Due to Pam working shifts I had all rights to choose fabric for this outfit. As such it is all my fault or all my glory. I think it turned out well to be honest. There are things I would do differently which I will outline below.
This is called the Tail bodice specifically for the pleated falls over the bustle and can be made in long or as you see here short length. It is designed as a late bustle period bodice/jacket and could likely have used a bit more pomp than I afforded it in the material choices I made.
The blue is a self striped polyester satin with a very soft fall. The colour was nice and worked well for Pam but the weight was all wrong for the pattern. This didn’t make much difference to the bodice pieces as they are all flat-lined with denim but it did make quite the difference to the tail pieces which didn’t really hold the pleating as well as a stiffer fabric would have. I don’t think the effect was detrimental to the overall look but it certainly didn’t showcase the double box pleating that is done to create the falls of the tail.
The detailing was simple, I just created a bordering using the brown fabric of the skirt. Lessons learnt since tell me that had I cut the strips on the bias it would have sat much better. The straight cut edging I think does effect the sit of the top and as I said it also could have used some more je ne sais quoi. Maybe ribbon detailing or beading or something to bring it more into the over lavish time period of Victorian. To me the styling seems like the more austere Edwardian period, but with bustle.
Skirt – Simplicity 5457
There isn’t much more I can say about the skirt than I haven’t already said here. The same pattern was used for this and a very similar material differing only in colour. Again like the bodice I feel that the skirt is lacking in decorative finery.
All in all the outfit turned out well but it does serve as a reminder of what could have been so much more even if it was good as is.
What suggestions would you have given to dress this up a bit more?
Labels:
costumes,
Hef,
Truly Victorian,
TV462,
Victorian
Saturday, January 21, 2017
A Look back at my Victorian Past Part 3 – Debbie’s Dress
This costume uses the same polonaise pattern as I intend to use for the most epic project. I do however want to point out how absolutely annoying it is that Debbie was so fantastic at fabric picking and trims that this one really was the standout in many ways and most of those ways had nothing to do with me. Everything about this just matched. Nothing was overdone, nothing looked cheap (even though like all of these it in many ways was, fabric would have cost $4-6/m at most).
Polinaise – TVThe original plan was to poofie up the back as per the pattern but I found once it was hanging on Mavis it just looked so good without it so the early bustle pattern ended up creating a late bustle look. The hardest bit on this was matching the pattern down the back panels, an effort that was definitely worth it as it would not have been nearly as amazing had we not taken the extra time.I want to take a moment here to talk about the Truly Victorian size system and just how awesome it is. Without it I never would have been able to complete the costumes in time. All bodice patterns have a system for working out what pieces you need to use. You measure about 10 different dimensions, do some tricky math (take measurement a from measurement b) or in my case force your husband to do said tricky math (not actually tricky if you don’t suck at math like me), and it will tell you what you need. For example when you take the across back away from the bust measurement and look up the remaining in the table it tells you your size for the front bodice is F but the measurements for the back piece equate to D. In this way you build your pattern pieces to fit your form. And 3 out of 4 fit perfectly first time. In fact on all of them I ended up using the trial as a lining. (the other two are myself and Ange who both had ageless pattern bodices and the one that didn’t work didn’t use the system correctly – more on that later). Anyway my advise if you have a TV pattern is to use their sizing system, yes it is more time consuming then just selecting all pieces the same “size” based on bust measurement but it is less time consuming than refitting pieces because your not perfectly in proportion. The fit is beautiful and worth the effort and icky “mathsing”.
Underskirt – Simplicity 5457
So the underskirt and “bustle” were taken from a butterick pattern, I just didn’t have the time to create proper cage bustles. The bustle effect on this is made by a shaped pillow that gets tied to the waist. It’s a good cheat if your just after a quick fix to get the right silhouette. The pillow pattern is included with the skirt and a bodice that we didn’t use (two bodices and an overskirt pattern to be exact).There isn’t much to be said about the pattern, it was very simple gored skirt with added fullness in the back. Debbie chose a steel grey duchess satin and trimmed with black lace and ribbon.All in all this was a very simple pattern, that yielded quite outstanding results.
Labels:
costumes,
Hef,
Simplicity 5457,
Truly Victorian,
TV410,
Victorian
Wednesday, January 18, 2017
A Look back at my Victorian Past Part 2 – Angela’s Dress
I love this dress, so much so that I am considering making one myself – I do have a plethora of emerald/forest green velveteen to use. The one thing that holds me back is that it wasn’t the easiest pattern I have ever worked with. Having said that I learnt a lot.
You may be asking why Ange didn’t make her own damn dress. Well you must remember that this was some years ago and Ange was still my young apprentice at that time. She certainly helped a lot, and probably could have managed a Truly Victorian pattern without to much issue but this is Ageless Patterns (#1478) and even for me who never really follows pattern instructions it was really hard. We had much resizing, reshaping, and Ange even suffered a 7 day lemon detox and super tight laced corset in order to get into it. It was a team effort because truly one person could not have suffered the frustration alone – no matter how beautiful the final product is.I should explain that people did not have much choice in their Victorian costumes. I did all the research bought all the patterns and assigned to each person based on what I thought would suit them best. What they did have a say in was materials because they bought and paid for all of that. However from the moment I saw this dress in black and white line drawing I just felt it was a deep green dress with cream inserts. Lucky for me Ange agreed and that was what we went looking for.She ended up with some sort of man made fabric, like a taffeta but a really cheap one. From memory it cost about $4/m which was lucky cause that train required a lot of fabric. The underskirt and front bodice were a cream fabric, something like a crepe I think with a stretch lace overlay. A stretch lace that still sometime haunts the corners of my worst sewing nightmares. The bodice was finished off with some hanging beads for some added bling.Like I said in Part 1 – Ageless patterns are not made to be easy, they have not been resized to adhere to modern figure standards and the instructions are close to non existent. This dress being simple, at least came with everything I needed to achieve a close to image look without to much sewing training. In the end we not only resized pieces but also added in another two panels in the centre front. To give you an idea of how out of modern proportion this pattern is the bust after resizing down/up would fit 36-38 inches whist the waist was 26 inches. Yes this pattern is made to fit the proportions of a barbie doll.As I mentioned the stretch lace was a nightmare but did add a certain bling to the final product so it was probably worthwhile in the end though “stretch lace” as a general term was added to the ever growing list of banned material. At least the scalloped edge meant that I did not have to hem it. All other material was fine to work with and the bodice pieces were also flatlined with the denim, again this was lucky because it meant that even if Ange didn’t technically fill out the bodice once corseted to the level needed for the waist – she at least looked like she did, since the denim held its shape.Like I said once complete this was one of my most favourite of the Victorian costumes and I really should give it another go sometime and see if my resizing ability has improved.
Tuesday, January 17, 2017
A look back at my Victorian past Part 1 - Hef's Costume
I realise that this blog has exclusively featured my fashion projects. This isn't so much by design as that the blog started after I had moved out of costume making and into vintage fashion sewing. See I used to make costumes for role playing LARP and so when I stopped doing so much LARP I also stopped making costumes. There is actually a wealth of costumes and fashion projects that haven't made their way onto this blog for one reason or another and I intend to catch up on some of them in the coming months, starting with the Victorian stuff that I mentioned in my epic project post.
So why does one be so bat shit insane as to agree to make 6 full Victorian female outfits, 3 Victorian coats and 6 full pirate outfits all in the same few months - the answer is Role playing convention. You have already seen details of Girlsquad's Marvel Costumes well the Victorian costumes were also for girlsquad. Though we had already agreed to be pirates as the Con Costume, one of our favourite GM's was running a Victorian cthulu LARP and we had a reputation to uphold.
So With only about 2 months to get it all done I escorted my lovely ladies to Cabramatta in search of the right materials, ordered a bunch of patterns from Truly Victorian and Ageless Patterns. Arranged sewing days and worked tirelessly to complete everything.
In this post I will cover the creation of the costume I wore
I love this skirt. The pattern is so simple yet so effective. Very few Pieces and came together like a dream. It basically has a front panel, and side panels and inserted back panels that get pulled together with a drawstring to create the fantail shape. I added horsehair braid around the hem and also added a dust cover to the train to try and protect the silk.
I can't recommend this skirt enough
Overskirt - Truly Victorian Split Pannier Overskirt TV328
I both like and don't like this pattern. Firstly like the fantail it came together very easily and gave a good line to the natural form shape but on the other hand some of the gathering in the front seams were difficult to get sitting straight, though it may just have been the material I was using. The Burnout didn't always drape perfectly. I still think the final outcome looked good.
The last pattern listed is for the petticoat in which you will have to wait to hear - as I will document that as I finish the UFO that has been sitting around all this time.
I will probably add to this post once I have found the actual outfit and can take more detail photos. But for now that's it.
So why does one be so bat shit insane as to agree to make 6 full Victorian female outfits, 3 Victorian coats and 6 full pirate outfits all in the same few months - the answer is Role playing convention. You have already seen details of Girlsquad's Marvel Costumes well the Victorian costumes were also for girlsquad. Though we had already agreed to be pirates as the Con Costume, one of our favourite GM's was running a Victorian cthulu LARP and we had a reputation to uphold.
So With only about 2 months to get it all done I escorted my lovely ladies to Cabramatta in search of the right materials, ordered a bunch of patterns from Truly Victorian and Ageless Patterns. Arranged sewing days and worked tirelessly to complete everything.
In this post I will cover the creation of the costume I wore
Bodice - Ageless Patterns #1442
This was the most challenging part of this project. Ageless Patterns are truly vintage with little to no updating for modern terminology or fit. I had to completely reshape several pattern pieces to make it fit my shape - the patterns original shape was that of full waist training. I obviously altered a lot to work with what I had and the look I wanted, however many reviews will tell you Ageless Patterns do tend to leave the decorating up to you - that is the pattern included is only the base garment. They certainly are not a pattern company for the novice or unadventurous.
Material used was some sort of polyester with a velvet burnout on it. I had originally wanted a stripe but I saw this and thought that is exactly what I want. I still remember it was $10/m a BIG spend for me in the days when I didn't ever spend more than $5/m. The trim is a silk duponi that I got on MASSIVE sale because spotlight was moving to new premises. I love the feel of the duponi and really wish I could afford to get more as it sewed like a dream and feels so luxurious.
The entire bodice is flat-lined in denim to give it enough body for the look - though there is a corset on underneath as well. I decorating it with some hanging beads and there is a cameo on the front (photos to come once I find this in my storage clean out)
Skirt - Truly Victorian Fantail Skirt TV225
I love this skirt. The pattern is so simple yet so effective. Very few Pieces and came together like a dream. It basically has a front panel, and side panels and inserted back panels that get pulled together with a drawstring to create the fantail shape. I added horsehair braid around the hem and also added a dust cover to the train to try and protect the silk.
I can't recommend this skirt enough
Overskirt - Truly Victorian Split Pannier Overskirt TV328
I both like and don't like this pattern. Firstly like the fantail it came together very easily and gave a good line to the natural form shape but on the other hand some of the gathering in the front seams were difficult to get sitting straight, though it may just have been the material I was using. The Burnout didn't always drape perfectly. I still think the final outcome looked good.
The last pattern listed is for the petticoat in which you will have to wait to hear - as I will document that as I finish the UFO that has been sitting around all this time.
I will probably add to this post once I have found the actual outfit and can take more detail photos. But for now that's it.
Labels:
Ageless,
costumes,
Hef,
Truly Victorian,
Victorian
The Most Epic of Major Project for 2017
So as I mentioned before I am going to be working on a major project
this year. A friend of mine joined an historical picnic society and has
been working on a gown with pocket panniers – You know the ones where you turn
sideways to fit through a door. Anyway she has been posting pictures of
her work in progress and working very hard on getting all the trims right and
making it look fantastic and doing an amazing job given she is pretty much
learning as she goes on a lot of the techniques. Well Mel has inspired me
to go back to my roots in sewing and make an epic costume. Inspired also
by a new friend who works in costume design and some of her amazingly
professional work I have decided to revisit the Victorian era and create a
costume from what I call skin up.
So what do I mean by “skin up”. This costume is going to include,
underwear, corset, bustle, petticoat, underskirt, Polonaise and hat. The
entire ensemble from the skin to what you see. Some of this will be able
to be made using stuff I have, the patterns are all taken care of, either I own
them or in the case of the corset my costuming friend is going to lend a hand
and help me draft up to my exact measurements. So below is the epic
nature of the vision I have with a deadline of July as I want to have a
historical picnic for my birthday.
Unmentionables!!!!
Underwear – Truly Victorian Combination Underwear TV105
Owing to the hot Australian climate (even our cold is not really that
cold by comparison to many other places) I have decided to make these in a
lighter fabric. Perhaps a lawn or a voile. I will need to reinforce
the button holes though, and I am undecided on whether I use the machines one
step button holer or make bound button holes. I will trim the bottom of
the legs and the neckline with some cotton lace just to add a little bit of
pretty. Technically this is the first piece I need to create, realistically
there is a UFO that may be finished first. I bought this pattern when I
made a whole bunch of Victorian stuff years ago but never got round to making
it.
Corset – Pattern By friend.
As I mentioned a friend is going to help me with a personalised pattern
for this. For me this is important as every Victorian corset pattern I
can find goes up to a DD bust at best and I am currently an F. I am not
entirely certain what fabric will be required but I assume I should be able to
make it with a homespun backing, canvas internals with metal boning and taffeta
as the outer layer of fabric. I am hoping since I already have the canvas
and taffeta. As a side note the taffeta is literally the oldest piece in
stash mountain dating from I believe 2004/5. The canvas I bought when I
made the Elizabethan ball gown.
Bustle – Truly Victorian Petticoat with Wire Bustle TV101
Again this is a pattern I have had for a while, I even bought the wires
precut that TV sell to make this project easier. I never did add all the
ruffles at the back but for a while there I had a bustle. My original
plan was to dig it out and finish the ruffle bit but when I took it out the
thing had gone a bit mouldy. Deciding that this was actually pretty gross
I harvested my boning and threw the rest in the bin. In the remake I plan
on using homespun as it has a good weight to support the wire cage but won’t be
too heavy. From memory the cage section may need to be reinforced and if
this is the case I will use an inner layer of canvas and back that again with
homespun. I am going to do all the ruffles on it (bring on the ruffle
foot that I will need to buy but I really don’t want to hand gather all of the
stuff that will need to be gathered in this project).
Petticoat – Truly Victorian Petticoat TV170
So remember that petticoat that I had in the post about my UFO’s.
Yeah I am going to make use of it. I bought all the stuff to make it for
my friend when I made a bunch of Victorian stuff back in I think 2008/9.
I saw the dolphin lace that is on the bottom and as she loves dolphins I
thought yeah I will make her that. But in true Hef style I bit of a lot
and had to chew fast (6 female Victorian costumes and 3 male). This
Petticoat along with one of the male coats and the combination underwear
got shelved in preference of having the externals finalised. Well
Now its time to bring it all back out. Whilst as I said above the
underwear should be first this is probably going to be the first finished
because well its very much done, over half way I would say. So the
petticoat won’t fit in with the all white unmentionables but what is life
without whimsy.
<>
The Outerwear
Bodice and Overskirt – Truly Victorian Polonaise TV410
I have made this pattern before for a friend in the great Victorian
sewing extravaganza. It is a very pretty pattern that is surprisingly
easy to do. I will poof it better for this one than in the picture
provided as I am after a more early bustle look where as my friends was more
late bustle. I am thinking it will be a royal to navy blue though the
exact type of material is still being considered, a lot will have to do
with costs. Depending on the shade of blue I will trim with either red or
maroon and white. I want to have a double sided pleat around the base and
neckline all the way around the bottom in white and a red strip running up the
centre of that trim. Whether I can get that done or not is another
question. I am going to also include a pleated undersleeve on the cuffs
and I will use a silver button to finish it all off.
Underskirt – Truly Victorian Trained Skirt Ensemble TV208
I have made this skirt before too, but I did so in a cheap satin and
even though it worked well it didn’t last long (it fell apart). I know I
will need to make some modifications to the pattern like I don’t want the skirt
to be that long at the back or that full. It may end up that I need to
purchase the 4 gore pattern but if I can get away with this pattern I think why
not. The plan however is to have the dress a walking length, or at worst
a s mall sweep train. I am going to make the skirt in white and Homespun
is likely, that way I can use the same material to trim the polonaise and the
skirt so the white matches. I will also do a double run of full pleated
flounces at the bottom (hence to walking length) which will also have a red
trim that matches the polonaise.
Adornments
Hat
So the final crowning glory on this outfit (pun intended) is to decorate
a boater hat in floral and lace/ribbon. This is going to be something new
for me because I am not a milliner but also because I don’t normally finish
outfits to that final detail and I guess I really want to see if I can do it.
Anyway that’s the plan, it is going to take a lot of work and attention
to detail, I won’t be able to rush this the way I normally do and to be honest
I don’t want to. Wish me luck.
Labels:
costumes,
Hef,
Plans,
Truly Victorian,
Victorian
Wednesday, January 8, 2014
The Mighty 50's Avengers
This is a catch up post - I made these dresses (with help) last Easter for a role playing convention in Sydney.
The basic costume idea was to create a visual of the avengers using a pattern of a 1950's dress. The pattern chosen, Butterick 5603, is a reprint from I think the early to mid 50's though the butterick website is not being very helpful and I am in no way inclined to leave my bed and check the envelope. It is universally flattering, with 3 choices of neckline and the easy fit and flare shape. As you can tell by the picture this was quite important as we are a mutli-shaped bunch.
In terms of the pattern I have no complaints, I had made it previously (which I will cover if only to put up pictures later.) We ended up using all 3 of the necklines though only I chose the boat-neck.
So to make this quick I will go through each "avenger" and the things done.
(left to right)
Hawk Eye
This dress was interesting, what the wearer didn't tell me was that she was pregnant and not yet ready to announce so when the first fitting was done it was a little tight on the waistline. I had to fix it by unpicking from under bust to flare and sew with a 1cm seam allowance at that part. The dress was done in colour blocking and has a hawkeye symbol on the front.... well most of one - She was responsible for that and she only got the two circles and missed the cross hairs.
Ironman
We used colour blocking on this too a little around the waist and then did bias neckline and the hem. The wearer borrowed a chest piece to complete the outfit.
Captain America
This one was a doozy - we had to shorten the waistline to fit the wearer and then break it into stripes which then had to be cut in the correct colours and pieced back together again in the right order. On top of that the stars required no only cutting out but applique to attached them... They go all the way around the hem and there is one on center back and front (the back was a mistake but not a bad one). Lucky for me I didn't do the applique - Ironman did
Hulk (ange)
Purple and acid green looked awesome together. This one also has the same crossfront as Ironman. It is green bodice then purple skirt to which we added green goddets. In hindsight I think I should have diamond pieced the bodice to the skirt but time was a factor.
Thor (me)
Obviously I have a lot of extra effort for my dress - and lucky for me I had Ironman to do the applique of the front swirls. I also did a hem of light grey that has a piping of maroon. Originally the caplet etc was to be red but we found that the bright red just didn't work with the grey so I went and got more maroon. The caplet comes from a 1940's pattern but I think worked well in this setting.
All of them were made for under $20 using poplin I picked up at $2/m in Cabramatta, sure it isn't the best quality but a costume is a costume and the price was so right.
A big thank you goes out to my girls all pictured for their help and also to my friend Gav for the hammer.
The basic costume idea was to create a visual of the avengers using a pattern of a 1950's dress. The pattern chosen, Butterick 5603, is a reprint from I think the early to mid 50's though the butterick website is not being very helpful and I am in no way inclined to leave my bed and check the envelope. It is universally flattering, with 3 choices of neckline and the easy fit and flare shape. As you can tell by the picture this was quite important as we are a mutli-shaped bunch.
In terms of the pattern I have no complaints, I had made it previously (which I will cover if only to put up pictures later.) We ended up using all 3 of the necklines though only I chose the boat-neck.
So to make this quick I will go through each "avenger" and the things done.
(left to right)
Hawk Eye
This dress was interesting, what the wearer didn't tell me was that she was pregnant and not yet ready to announce so when the first fitting was done it was a little tight on the waistline. I had to fix it by unpicking from under bust to flare and sew with a 1cm seam allowance at that part. The dress was done in colour blocking and has a hawkeye symbol on the front.... well most of one - She was responsible for that and she only got the two circles and missed the cross hairs.
Ironman
We used colour blocking on this too a little around the waist and then did bias neckline and the hem. The wearer borrowed a chest piece to complete the outfit.
Captain America
This one was a doozy - we had to shorten the waistline to fit the wearer and then break it into stripes which then had to be cut in the correct colours and pieced back together again in the right order. On top of that the stars required no only cutting out but applique to attached them... They go all the way around the hem and there is one on center back and front (the back was a mistake but not a bad one). Lucky for me I didn't do the applique - Ironman did
Hulk (ange)
Purple and acid green looked awesome together. This one also has the same crossfront as Ironman. It is green bodice then purple skirt to which we added green goddets. In hindsight I think I should have diamond pieced the bodice to the skirt but time was a factor.
Thor (me)
Obviously I have a lot of extra effort for my dress - and lucky for me I had Ironman to do the applique of the front swirls. I also did a hem of light grey that has a piping of maroon. Originally the caplet etc was to be red but we found that the bright red just didn't work with the grey so I went and got more maroon. The caplet comes from a 1940's pattern but I think worked well in this setting.
All of them were made for under $20 using poplin I picked up at $2/m in Cabramatta, sure it isn't the best quality but a costume is a costume and the price was so right.
A big thank you goes out to my girls all pictured for their help and also to my friend Gav for the hammer.
Wednesday, July 7, 2010
Good V Evil - My Birthday Party costume
So all the vintage sewing needs to be put on hold for a bit whilst I return to my roots and create a costume for my Good v Evil themed birthday party at the end of the month.
I toyed with buying, rehashing and renting a costume but as always I return to the place of I want to make it to save a buck. It really is a horrible indication of society when I can make a costume cheaper than I can rent one, or even buy one of those cheap 3 strips of cloth legs avenue slutty costumes. You know the ones that barely cover the butt cheeks, look great on the leggy model in the advertisement but somehow make every normal person look like a sausage dressed for some raunchy bedroom roleplay.
Simply put I love those naughty but nice costumes, I want them all, but I don't have that lean svelt figure, and haven't done for about 5 years, so I am going to make a costume similar but more on the modest line, you know drop the skirt a couple of inches, and make sure that it fits my odd dimentions.
So I have decided that I will be going as a leprecaurn, thats right a slutty one. Simplicty has regailed me with two choices of pattern and to be honest I am leaning towards the this one.
I like the vest bit, and I have a green velveteen at home that I have had for AGES that I can make the coat out of, get some gold glittery/sequiney stuff for the vest, and the White cotton I have for the dress and then maybe I could do a black or green overskirt (so the dress worked kind of like a petticoat) and a bow tie, plus of cause the hat - I think small top hat.
I should be done in a week so I will let you know how it goes.
Hef.
I toyed with buying, rehashing and renting a costume but as always I return to the place of I want to make it to save a buck. It really is a horrible indication of society when I can make a costume cheaper than I can rent one, or even buy one of those cheap 3 strips of cloth legs avenue slutty costumes. You know the ones that barely cover the butt cheeks, look great on the leggy model in the advertisement but somehow make every normal person look like a sausage dressed for some raunchy bedroom roleplay.
Simply put I love those naughty but nice costumes, I want them all, but I don't have that lean svelt figure, and haven't done for about 5 years, so I am going to make a costume similar but more on the modest line, you know drop the skirt a couple of inches, and make sure that it fits my odd dimentions.
So I have decided that I will be going as a leprecaurn, thats right a slutty one. Simplicty has regailed me with two choices of pattern and to be honest I am leaning towards the this one.
I like the vest bit, and I have a green velveteen at home that I have had for AGES that I can make the coat out of, get some gold glittery/sequiney stuff for the vest, and the White cotton I have for the dress and then maybe I could do a black or green overskirt (so the dress worked kind of like a petticoat) and a bow tie, plus of cause the hat - I think small top hat.
I should be done in a week so I will let you know how it goes.
Hef.
Subscribe to:
Posts (Atom)