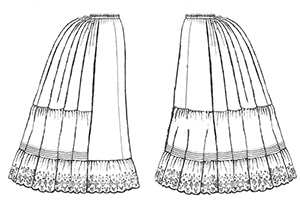
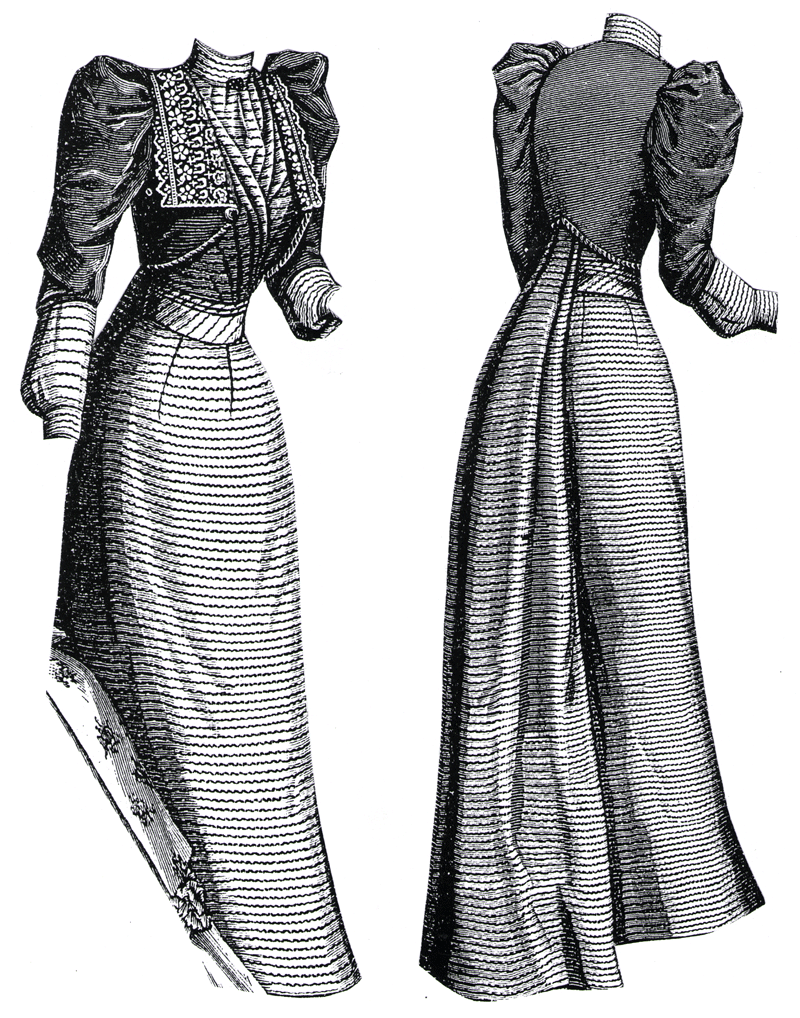
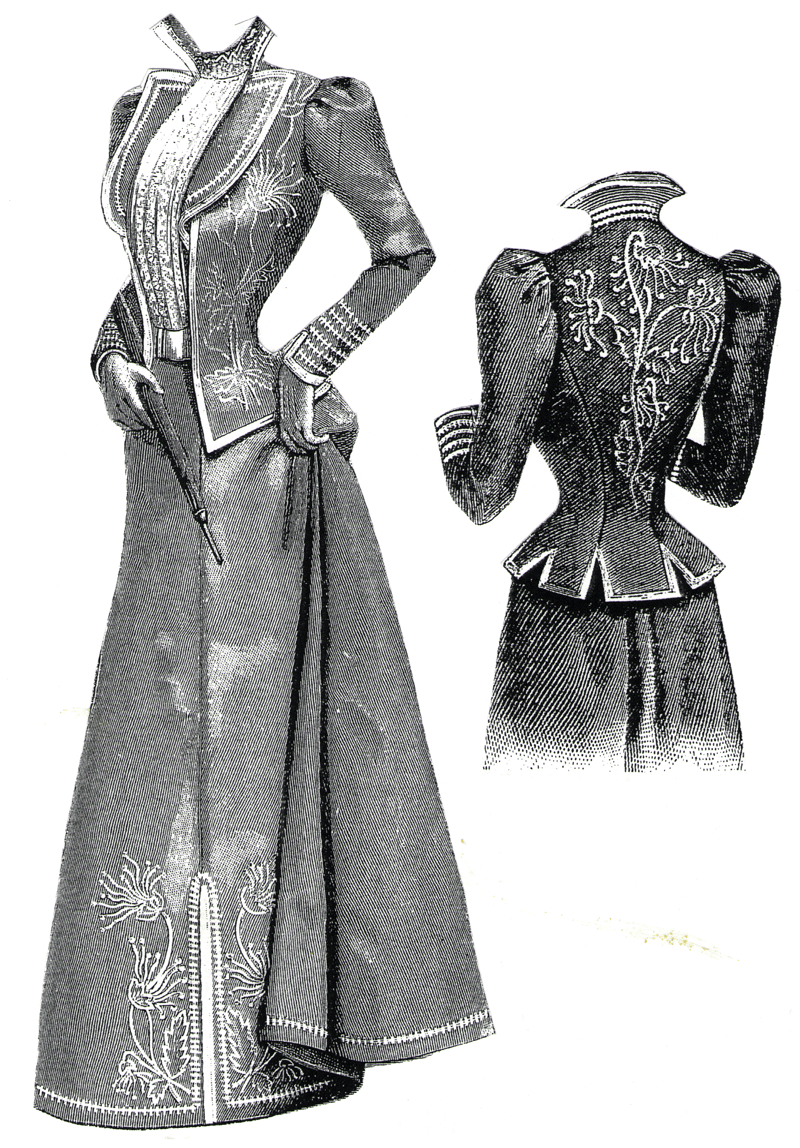
Showing posts with label Hef. Show all posts

Sunday, December 6, 2020

Chemise a'la Reine - History and Planning

 The Chemise a'la Reine, which translates to "underwear of the queen" is a very simple but beautiful dress that had a small role in changing history.

At the 1783 Marie Antoinette dared to be shown wearing the lightweight, "peasant" style garment in a painting by Elisabeth Louise Vigee Le Brun. Whether it was because the queen was seen to be in underwear, or because the queen was appropriating or costuming outside her class is unsure but it caused a big stir within all classes of France. The disapproval was so complete that the artist repainted the queen using the same base in a more aristocratic garment and the painting was quickly swapped out.  


The damage however had been done.  While this garment is certainly not a deciding factor in the french revolution it was ammunition for those apposing the rule of Louis XVI against the already unpopular Austrian born queen.

Marie Antoinette is an historical figure whose existence is shrouded by her legend, her extravagant lifestyle, the infamous "let them eat cake", a far cry from the humble last words of "pardon me sir, I didn't mean to" (having accidentally stepped on someones foot on the way to the guillotine).  We as modern people are left to wonder what is true and what is propaganda.  What is fact without question however is that she was a very real human being, who's life and death was dictated by the whim of politics.  She died as a sacrifice to the revolution in 1799 less than a month shy of her 39th Birthday.

Despite the shock when it first emerged, and quite ironically the chemise a'la Reine was taken up by Josephine, wife of Napoleon first emperor of France and inspired the regency fashion that was to follow.

But I doubt you are here for a history lesson, its about the sewing right.  Well, this dress looks to be the first project I will kick off in 2021.  I have some very clear reasons for this.  Firstly having had a baby in October I am not in what one would call my perfect shape and the ease of sizing in this garment makes it perfect for both weight gain and weight loss.  Secondly the lightweight cotton fabric is great for Australian summers, and finally because I can wear this with or without underpinnings.  The true historical silhouette will have the stays but I would rather ease back into sewing with something a bit more simplistic than stays, that and I haven't yet found a pattern I would like to make stays for the 18th century.  I am open to suggestions on that.

Speaking of patterns, i will technically be drafting this one but it will be based on this pattern found online (so sorry but I can only find it on pintrest so if someone knows who should be credited I will be very grateful). 


As you can see, it is a very simple pattern to work with, the entire dress is just masses of lightweight cotton pulled together around 2 drawstrings in the mid section and a further neck drawstring front and back with a separate shoulder piece added. The sleeves similarly are also shaped by either full gathers at shoulder or the drawstrings at elbow and lower edge.  This is to be in line with the image of Marie Antoinette.  If you are interested in making your own different sleeve treatments not only exist but are period appropriate like this extant example.
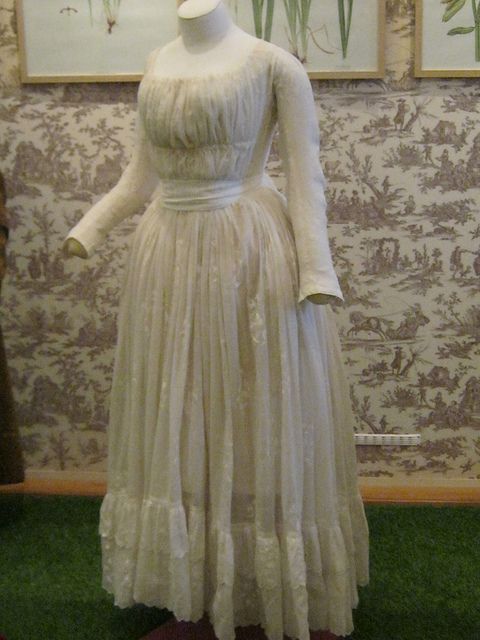


We can not see in the Queens Portrait whether her dress had the bottom ruffles but as I will include the neck ruffle I think I will go with a more plain hem.


So what we are up to now is how this fits into the goals set in previous post.

1. Challenging.

Whilst the dress is deceptively simple in theory in practice it requires meters and meters of hand sewn tiny rolled hems to be useful.  In order to achieve this the fabric must be cut 100% on the straight grain.  There is no near enough is good enough that usually tempers my efforts.  I will need to draw threads and cut precisely for this to not turn into a hemming nightmare.

Therefore the skills I am working on are being more precise in set up and hand sewing.

2. Stash items

For reasons that will be made clear in a future post this week, I am the owner of between  10 and 15m of white cotton voile that will be perfect for this project.

Need to source is only twill tape and silk ribbon.  Plus the hat stuff if I want to get the right Marie look, though I may do headwear slightly less formal than the portrait above

2020 - Realisations/2021 - Goals

 As the hell year that was 2020 comes to a close I find myself very inspired to get a whole bunch of sewing done in the new year.  How much I get through is questionable as I will be on a year of maternity leave so finding a balance between parenting, housework and sewing may be hard.  

I also have 2 goals to work on sewing wise this year, they are

1. Increase skills by working on more elaborate and complete pieces

2. Work through stashed fabric and notions

The first goal is logical, we only get better if we challenge ourselves.  The second has a sad but kind of inspiring story attached.

At the beginning of 2020, my mother passed away.  She was young at 66 and it was an unexpected loss.  I won't go into large details but sufficed to say as she was also a sewist and as I am the only relative who is also a sewist, I inherited a large amount of sewing stuff.  It is also probably relevant to point out that we were also both kinda low key hoarders with a special interest in sewing stuff, so stash mountain has turned into stash Everest.

I did let a lot of the stash go, donating to The Sewing Basket or to family friends who were making large numbers of masks given the situation with Covid.  In truth there was no way I could ever consider being able to get through it all.  But there were many many fabrics I kept, so many of them purchased with plans to make things for her grandchildren - a task I will try and complete in this year coming and others fabric she had had for a long time.  Fabric she found and liked and would use one day but never got the chance.  Perhaps the right project never did come up or perhaps it did but what if she lost weight (she was always trying to lose weight) or what if she found something more perfect to use it on.

I think we all have a stash like this, we end up buying fabric specifically for projects rather than using what we have and a lot of what we have could have been used but its like deciding between having your cake and eating your cake.  What I realised in all of this was cake is no good if you don't eat it.  Eating it is its purpose, having it is a waste.  So 2021 needs to be the year I realise the perfect project is the one I have now not the one that may or may not exist in the future.  That silver and grey brocade I have been holding onto for nearly a decade, the vintage fabrics I found at fairs all of it is useless unless I use it.  I don't want to hold onto it and then miss my chance.   

With that all in mind I have started making lists of ideas on what projects I could conquer in 2021 - Assuredly I will not get through all of this but the priority is that each project must meet both goals.  I will list them here in short form so that I can refer back to it when I finish one and move onto another.  Some of these I will expand on in planing posts so that I also have an easy reference place for all my research.  (List is being done in chronological groups)

Please feel free to comment on what projects you think would be most fun or that you would like to see or hear about.

Medieval

  • Viking Apron Dress
  • Tudor Catherine Parr 
  • Italian Renaissance Gown

1700's

  • Robe a'la Francaise
  • Robe d'Anglaise
  • Slytherin Riding Habit
  • Chemise a'la Raine

1800's

  • Regency Silk Ballgown
  • Scarlett's Orange Mill Dress
  • Linen Walking Ensemble

1900's

  • WW1 Era dress
  • 1920's daywear
  • WW2 Military Suit
Non Costume Sewing

  • Vintage inspired work pieces
  • Mums Children's wear
  • Baby Bix Baby clothing
Fixes and Finishes on old projects

  • Elizabethan Cartridge pleating
  • Cursed Green Dress
  • Blanket Dress
  • Plaid Dress
  • Toph's Victorian Coat

Monday, June 17, 2019

India Wilkes dress final

So I just realised I forget to post this one up .... after all that build up lol

Before I start I have been looking at my stats and seeing that there appears to be people all over the world you read this.  Weird feeling.  Out of interest please leave a comment about who you are and where you are from it would be nice to know who's connecting to this.

Anyway without further ado, and I believe there should be a post for each part so I won't go into to much detail in this one just an overview.  If I have missed any pieces I will go back and fill them in later.

The dress was a raging success though I am still on the hunt for a snood.  Below are some pics because I know when I am looking at blogs that's the main thing I am interested in anyway :)  Enjoy and remember leave a comment I would love to know what you think of my work.


Edwardian Madness - Ageless #1344

Ageless Patterns had a sale in April to celebrate their  birthday and I couldn't resist.

Firstly I was already looking at there patterns for an outfit for an 1899 outing in December and secondly I am a sucker for sales!!.  I end up with 3; #1315 from 1892, #1389 from 1898, and #1344 from 1912.


My original plan was to make the 1389 for a tram anniversary in  December and the others were just to make postage viable and take advantage of the sale.  However when a steam train ride to Kiama appeared on my Facebook feed and a friend in the Historical Picnic Society decided to organise the troops the 1912 jumped the queue.

Planning Process
This pattern says (and Ageless even checked there original for me) it is a 40" bust and a 27.5" waist.  I made up a trial knowing that I would not ever corset down to a 27.5 at the moment expecting to resize.  In the end it actually fit my 40"/30" amazingly well with zero alterations.  I can't explain this but don't look a gift horse in the mouth.

Ageless patterns do take more planning than many others due to the lack of instructions.  Ageless do not pretend to be anything more than a reproducer of the original pattern with original instructions.  Thus it is important to remember going into this that no one will hold your hand, "finish in the usual way" was a very valid instruction for the Victorian and Edwardian times when sewing was much more widespread and people just knew how to do those things.  Given that i rarely actually follow instructions this isn't a huge hindrance to me but I understand it may be to others.

These instructions seemed even more vague than usual, possibly as the original is in french and Ageless have translated as best they can.  Both English and French are included so if you do speak both perhaps it would be easier for you.  The biggest issue I had was was the closure none of those instructions made any sense nor did the pattern pieces that came intuitively give you a closure point.  Instructions say that bodice closes at center back, and that the first few buttons on the front are functional but with no center back seam on the skirt there was no place for the waist band to open.  I decided after consulting many online groups to add a center back seam and go from there.  This has worked though I can't say I am a fan of the hook and eye closure and will be de-historifying it with a button covered zip in the near future.

Another point to be aware of is that the entire over bodice is one huge pattern piece with some deceptively simple shaping techniques for the sleeves and the side seam. 


In short ease the dart in the sleeve part, sew small darts into the underarm/underbust/side seam area.  Line up sleeve ends and side seam bottom pull straight and sew one continuous seam. 


Took some fiddling but this was worked out in trial stages.  Not doing this will cause the arm to twist oddly.


Fabric Choice:
Knowing that this dress would be for winter - specifically for this train trip I wanted a warmer fabric than the suggested taffeta.  After much deliberation I decided that despite my wool allergy a wool or wool like would be best and due to the bodice piece issue a non plaid.  Any pattern was going to need to be small and able to conform to biases.  I thought and fiddled and searched until I happened upon a beautiful marle Oxblood mostly acrylic (yay for less allergins) from Pitt Trading.  I accented with tulle from stash, lace and velveteen from spotlight.  Lining is left over white cotton and white linen/cotton.

Buttons came from a shop in newtown that sells huge amounts of buttons in all shapes sizes and colours.  They are a black plastic with a little shine to them.


The Making:
This pattern (by fluke of fitting me) came together perfectly once I had worked out the few small issues - being the closure, the sleeves twisting and that I misinterpreted a pattern marking and cut off some of the left side skirt (yeah don't do that  - you will have to add it back later).

The fabrics were of little issue EXCEPT the tulle. It has gone straight onto the banned list and I will avoid it now like a creeper in a club.  I have to thank Angela Clayton for the inspiration to overdo the dicky adding both lace and pleated tulle.  Undeniably it looks fantastic, but it was a nightmare to control and still is.

Horrible pleating tulle
But soooo pretty

So without further ado here is the pictures of the finished dress beautifully backdropped by vintage trains.


As a side note the hat was also made - I will eventually do a post on that too - another credit to Angela Clayton.

Thursday, August 16, 2018

Plans for October - the India Wilkes dress

The historical picnic society will be heading to the Hunter Valley Gardens in October for some more classy costumed shenanigans.

Hunter valley gardens is a series of manicured gardens in various styles including the storybook garden (my favourite) Asiatic gardens, traditional British etc. basically there are loads of beautiful backdrops for photos.  The plan is to bus down together then have high tea there before a stroll and photos.  I’ve even convinced my Husband to accompany me.


So step one is obviously costume plans. So I thought I would follow this one properly and start the blog at the beginning rather than just one post at the end.

I tossed up between an Edwardian "Gibson girl" kind of look and a Civil War hoop skirt.  One of the other lovely ladies who helps organise these outings pointed out - passers by love hoops.  I don't know if I ever mentioned this but I am a crowd pleaser so that sealed the deal.

Like all people who aren't too caught up in historical accuracy when planning a civil war recreation I turned to the master of all civil war recreations - Walter Plunkett and Gone with the Wind.  Here is a second confession, I have always loved India Wilkes.  As my friend put it the sour faced second string bitch.  And I really really love her outfit from the twelve oaks picnic. So it was decided almost instantly that this would be my dress, and so the planning could begin.


Costume pieces needed:

  1. Corset - already ordered for previous Victorian and was on its way 
  2. Victorian underwear - Use the combination underwear from TV105 made for previous victorian.  I know its probably not accurate but it provides draws and corset cover in one so winning
  3. Hoop Petticoat - Hoping to be able to use the china cheapie that I got for the Elizabethan dress. 
  4. Petticoat - Needs to be made, possibly from the free TV Pattern or hopefully fully flounced if I can work out my own pattern
  5. Bodice - Pergoda Bodice TV440 - now comes with undersleeves so no need to get an extra layer in shirt
  6. Overskirt - Self draft gathering tube to waistband.
  7. Snood - the headpeice, I will try and find on ebay or etsy
  8. Shrug - Crochet is not my thing so I may have to buy this one too
  9. Shoes - Given the walking I will be looking at ballet flats.

Watch out for my next post which will be breaking down the outer layers, including sourcing fabric, and planning decorative trims.

Happy sewing


Sunday, July 29, 2018

Victorian Christmas in July

A year ago (as it turns out to the day) I suggested to some friends that we go to the Carrington Hotel in Katoomba in July dressed in Victorian for high tea.  

I chose the The Carrington, which originally opened in 1883  because it retains that old world charm.  Every year they decorate a tree and put all the trimmings out in July and year round they do a well-priced and tasty high tea.  You can visit the dining room or ballroom for the high tea (depending where they are serving) the reception area, two lounges, library, billiards and office, all decorated in period charm.

I set the wheels in motion with a tentative early july date in September for the Historical Picnic Society, and whilst the numbers on the day were low (just the three of us) a good time was had by all. Personally I think we made several patrons day as they oohed and ahhed at us walking through to take photos at various hotel locations.  One group who all drove vintage triumphs even asked for our photos.

So this being about sewing you can see how the idea linked into my plans for a full Victorian outfit last year.  Let’s just say I was a bit behind on this one.  Not that I haven’t been sewing just that instead of working on this plan I have made multiple kids outfits (post to come) a costume for stage and a new dress.  On top of all this it is really really hard to sew with a two year old who loves to help.  Last night I was pinned in the leg three times as he “helped” me with some hand sewing.

Anyway in true Hef fashion despite a year lead time I created my entire outfit in under a week.  Planning and tracing took about 3 days and then I made the entire thing in one night (bustle not included).  There are further plans to complete this work to a much much higher standard as per the original plan but this is the shell in which I start.

I have continued to add and improve on this which will require another post once done

The outfit


This took about a day from start to finish including all the ruffles being done by hand.  Yes I know I bought a ruffle foot but damned be to the gods if I can work out how to use it.  This included tracing, cutting and all finishes. I think there is a couple of changes I would like to make to it but all in all it works and is a solid piece.

The wires are a size Medium.  I am not.  I was once and who knows maybe I will be again one day but it is not this day.  However because of the wire size and the plan to wear a corset I made the medium anyway.  For this reason the case isn’t quite as wide as my hips, or at least I assume it isn’t as wide as it should be which gives a smaller silhouette than it should.  Given that I am not THAT worried about historical accuracy I don’t think this is a big problem.

Things that I am missing include the bottom ruffle (not enough fabric left, due to indiscriminate cutting) what I may do is just do a less ruffled bottom ruffle to finish it.  I am also thinking I may add some lace to the bottom of each ruffle just to add some interest.

Unfortunately, my bustle had a wardrobe malfunction internally on the day.  The ties that control the bottom wire decided they would rather not exist than deal with the strain of my butt and the stitching on one side came undone.  Consequently the bustle doesn’t sit quite right in the photos but we make do.  The issue has been repaired and seems to be holding much more strongly now.  I assume this strain to be based on that size issue previously discussed.

The fabric is a quilting cotton that I picked up in spotlight a year ago specifically for the skin up Victorian project so technically it was stash fabric.  I picked it because it is of neutral shading but has this pretty white print on it that is barely noticeable.  I thought it was both pretty and likely to hide under any colour skirt I should choose.


I tossed and turned over this or the wash overskirt with the fabric choices.  I would have preferred the more Austere 1887 outfit but concern over yardage lead me back to the polonaise.  Sadly once all was said and done I probably could have done the wash but oh well that will just need to be a project for another day.  I had two different fabric choices, one was a light blue stripe with white underskirt and the second (which I went with) was the brocade and green satin.  

The biggest benefit of the polonaise is that having made it twice before (once as per the previous post and then again as a stage costume) I knew that I could throw it together quite quickly, and as previously mentioned anything worth doing is worth doing last minute.

The Brocade I got for a steal about 3 months ago. 50% off the already marked down price at spotlight brought it down to $5/m.  The Green Duchess has been in the stash for years, since 2012 to be exact.  I remember it was like $2/m at Cabramatta and I wasn’t going to get any for me then a friend I was with bought me 4m as a present for helping her make a costume.  For cheap fabric its actually pretty nice to touch and has a lot of body.  I was concerned that they didn’t go together but after a quick facebook survey I ended up reassured.  In the end I went with this over the light blue and white because I felt that the stripes could work well as a regency where this was less versatile, and who can turn up a red/green combo for Christmas in July.

As noted the polonaise was made in a single night and the underskirt the following morning before we left.  As such I can’t say that on this wearing the finishes were, well finished.  All my internals were open and lining unsealed, there was no boning in the polonaise, the ties in the bustle bit were tacked in bias binding.  I added the snap front closure in the morning.  Luckily you can’t really see any of the rush in the wear but let’s say the slightly too small corset was knee in back tight just to allow the snaps to stay snapped.

After being totally jealous of the finishes on Marion’s Beautiful taffeta extravaganza I have decided not to let sleeping dogs lie and begun the process of finishing the internals and closing off seams, upgrading and more thoughtfully placing the bustle ties and considering closure options.  Do I go buttons or hooks and eyes…. So hard to decide.  Anyway I will repost with the updated, finished and fully tizzed up version once complete.


The underskirt is very simple, three front gores and two back pieces gathered onto a waist band.  I do think maybe this skirt has a little too much fullness for the outfit and I MAY decide to take out some of the a line in the front gores at least, however these shots only have the bustle underneath and perhaps with a finished petticoat the skirt will hold itself better.  

Made in a matter of hours from trace to wear, there is a few things I want to change on this.  Firstly the waistband is too big.  I mean it is the right size for me without a corset but can’t be tightened to the corseted waist measurement.  I am thinking of removing the ties and adding a button/buttons to allow for both sizes to be utilised.

Secondly it is very plain, I have plans to add a pleated ruffle around the bottom just to dress it up more to the Victorian over-dressed standards.  I have enough fabric left for it.  I also may pink the internal seams.  Full sealing isn’t necessary as it won’t be a high wash item.


Missing items
TV105 – all in one underwear.  This is about 80% done now so its on the to do pile
TV170 – Petticoat, that has been hanging around about a decade now unfinished.  Movement has happened and it will be finished in the next few weeks for the finalised.  Fun Fact  I lost the waistband so now will need to buy just a smidge of yellow poplin to be able to finalise.

Saturday, February 11, 2017

A Look back at my Victorian Past Part 5 – Stacey's Ensemble

This was a nightmare of a costume to make.  Bit of background - these costumes were made for a game at a role-playing convention, yes it has crossed my mind since that it was a lot of work for 3 hours of use but that aside.  In addition to all the Victorian costumes I was also making all these pirate costumes (that were worn for the 4 days).


I did get a lot of help from the lovely ladies but I was at the time the primary sewist.  Stacey was the second and so she made her pirate outfit and was also going to make her Victorian.  Pirate went off without a hitch but Victorian was presented to me the afternoon before con, the self drafted underskirt complete and the Wash over skirt mostly complete but the bodice was simply pieces.


Now remember when I said that TV had the best sizing system ever - well Stacey did not listen to me and had decided she would need the largest pattern size and thus traced and cut that out.  So Yeah, perhaps a post on perception v's reality may be in order some time.  Anyhow we were up until about 4 or 5am getting this completed a task made all the more fun by Stacey's bizarre ability to stab herself with any pin post about 3am to which the sewing hours after that became known as stab o'clock.

I won't break this one down as I did the last ones because as I have already mentioned I didn't sew a lot of it.  From what I can tell the Wash Over skirt sews together well looks great and is easy to deal with in terms of cleaning and storing.  The whole skirt flattens out for ironing and cleaning.  what I will focus on is the bodice.

We changed up the sleeves (to make it easier at stab o'clock) and changed the neckline quite substantially.  I was especially proud of having lined up the chevron despite the resizing stress.  I assume it would have sewn together much better if the proper instructions were followed from the start.  Lucky I had some practice with the whole resize thing on my own bodice so it wasn't completely foreign though I would still only rate myself novice at best.

Anyway there is now only one Victorian to go but alas I will need to get a better picture as the one I have is only from behind.


Thursday, February 2, 2017

The Elvis Dress

I have been wracking my brain to find the pattern that I used to make this dress.  Anything, even a brand but it is alluding me and with all my patterns currently boxed up and out of the way it isn't something I can easily search out.  I even tried the database I am building of patterns I own only to discover that I have wrongly catagorised a pattern as this when it obviously isn't.


However without further ado I will tell you what I do know.  This dress is made from a vintage 1950's pattern.  I think it was a mail order pattern to be honest, so not branded or numbered anyway but once I have dug it out of storage I will add the details and a photo to this post.  The features of the dress are box pleated skirt (There is one on the center front with is easy to spot and two on the back that get lost in the gathers - this isn't a mistake the pattern made me do it.)  the bust is fitted by these awesome open ended darts that I love and the neckline as per the pattern is boat.


This dress fits like a glove, no resize, no issues just on and go.  Personally I think it must be something in the design because I wore it right up to about 6-7 months pregnant and it still looked ok.  The fall of the skirt is flattering and the fit of the boat neck surprising as this is something that normally needs to be individualized.   Not just me though as I made a version of this for a friend and it fit her to and she is way broader and thinner than me.


The material I used I love, it is a clever trick of the eye where it looks from a distance kind of like a patterned striping but when you get up close - bam that's Elvis right there in one inch repeat and two awesome colours.  It is a quilting cotton that came out many years ago there was a series with elvis prints and one with Beatles prints.  I still have some Beatles heads to make something with but this is what the precious Elvis fabric was destined for..  There were several considerations (which appears to be why I have it wrongly labeled in my database) but few 50's patterns can carry a strip like this.  I needed one with a full gathered waist because I did not have the fabric to try and match striping on gores.

I like the way the zip fits in too, it is by pattern set a few inches below the neckline, very handy for people like me who screw up zip inputs all the freaking time!


I made this dress in 2011 and I still love wearing it now, I still get compliments on it and it still makes me feel just a little funky.  I remade this pattern with some changes that Christmas but I will do a different post on that one once I get some images done.

Wednesday, February 1, 2017

A Look at my Victorian Past Part 4 - Pam's Ensemble

Due to Pam working shifts I had all rights to choose fabric for this outfit.  As such it is all my fault or all my glory.  I think it turned out well to be honest.  There are things I would do differently which I will outline below.


This is called the Tail bodice specifically for the pleated falls over the bustle and can be made in long or as you see here short length.  It is designed as a late bustle period bodice/jacket and could likely have used a bit more pomp than I afforded it in the material choices I made. 

The blue is a self striped polyester satin with a very soft fall.  The colour was nice and worked well for Pam but the weight was all wrong for the pattern.  This didn’t make much difference to the bodice pieces as they are all flat-lined with denim but it did make quite the difference to the tail pieces which didn’t really hold the pleating as well as a stiffer fabric would have.  I don’t think the effect was detrimental to the overall look but it certainly didn’t showcase the double box pleating that is done to create the falls of the tail.

The detailing was simple, I just created a bordering using the brown fabric of the skirt.  Lessons learnt since tell me that had I cut the strips on the bias it would have sat much better.  The straight cut edging I think does effect the sit of the top and as I said it also could have used some more je ne sais quoi.  Maybe ribbon detailing or beading or something to bring it more into the over lavish time period of Victorian.  To me the styling seems like the more austere Edwardian period, but with bustle.

Skirt – Simplicity 5457

There isn’t much more I can say about the skirt than I haven’t already said here.  The same pattern was used for this and a very similar material differing only in colour.  Again like the bodice I feel that the skirt is lacking in decorative finery.

All in all the outfit turned out well but it does serve as a reminder of what could have been so much more even if it was good as is.

What suggestions would you have given to dress this up a bit more?

Sunday, January 22, 2017

The Beatles Dress

This dress was made for me to wear on one of the most important days of my life - the day I met the single hottest man on earth, and got my picture taken with him.


Anyway this blog is about the sewing/fashion type stuff not to gush over Karl Urban.  Unfortunately I am too big to fit this dress at the moment - though it is close so hopefully this year will see it back on my back (and can you believe I thought I was "fat" when I made it)


Anyway jokes aside this dress is made using a simplicity reprint 1960's shift.  Some (ok all) of the seam detailing is lost in the super psychedelic pattern I chose to use.  The material was part of a quilting series for the Beatles and is called Yellow Submarine.  It was my first time working with Quilting cotton and I loved how it it sewed.  Quilting, however is a heavier cotton than some so works better on dresses with structure.


I chose the short version of the dress, because I have always loved mini's.  Age and wisdom has told me that sometimes the heart has a love the legs can't carry off, were I to make this again I would use the longer version.  The mini is super dooper mini, even at the time I ended up wearing it more like a tunic over jeans.  Don't judge me it was the style of the time.

I lined the dress in some navy polyester lining.  The lining was sewn like a bubble into the hem to avoid any visible hem seems on the front of the dress.  Basically, I cut the dress a few cm longer than the lining and sewed the two together.  Then I ironed it so that the extra dress hem folded up into the lining.  Not something I would recommend to others as ironing is a nightmare but the concept of a hem stitch was years away at this point.  The other change that I made was to move the zip down, mostly because it meant I would not have to finish the zip top.

Things that I like about this dress, the finishes are all well done.  The fabric is amazing and stands out and the dress when it did fit, fit really well.  I was initially; concerned that with my bust it wouldn't sit well but I was pleasantly surprised.  There is just enough shape in the dress to define waist and hips.

I do recommend this pattern
I also recommend the Beatles - still the best band of all history.


Saturday, January 21, 2017

A Look back at my Victorian Past Part 3 – Debbie’s Dress

This costume uses the same polonaise pattern as I intend to use for the most epic project.  I do however want to point out how absolutely annoying it is that Debbie was so fantastic at fabric picking and trims that this one really was the standout in many ways and most of those ways had nothing to do with me.  Everything about this just matched.  Nothing was overdone, nothing looked cheap (even though like all of these it in many ways was, fabric would have cost $4-6/m at most).


Polinaise – TV
The original plan was to poofie up the back as per the pattern but I found once it was hanging on Mavis it just looked so good without it so the early bustle pattern ended up creating a late bustle look.  The hardest bit on this was matching the pattern down the back panels, an effort that was definitely worth it as it would not have been nearly as amazing had we not taken the extra time.

I want to take a moment here to talk about the Truly Victorian size system and just how awesome it is.  Without it I never would have been able to complete the costumes in time.  All bodice patterns have a system for working out what pieces you need to use.  You measure about 10 different dimensions, do some tricky math (take measurement a from measurement b) or in my case force your husband to do said tricky math (not actually tricky if you don’t suck at math like me), and it will tell you what you need.  For example when you take the across back away from the bust measurement and look up the remaining in the table it tells you your size for the front bodice is F but the measurements for the back piece equate to D.  In this way you build your pattern pieces to fit your form.  And 3 out of 4 fit perfectly first time.  In fact on all of them I ended up using the trial as a lining. (the other two are myself and Ange who both had ageless pattern bodices and the one that didn’t work didn’t use the system correctly – more on that later).  Anyway my advise if you have a TV pattern is to use their sizing system, yes it is more time consuming then just selecting all pieces the same “size” based on bust measurement but it is less time consuming than refitting pieces because your not perfectly in proportion.  The fit is beautiful and worth the effort and icky “mathsing”.

Underskirt – Simplicity 5457

 So the underskirt and “bustle” were taken from a butterick pattern, I just didn’t have the time to create proper cage bustles.  The bustle effect on this is made by a shaped pillow that gets tied to the waist.  It’s a good cheat if your just after a quick fix to get the right silhouette.  The pillow pattern is included with the skirt and a bodice that we didn’t use (two bodices and an overskirt pattern to be exact).

There isn’t much to be said about the pattern, it was very simple gored skirt with added fullness in the back.  Debbie chose a steel grey duchess satin and trimmed with black lace and ribbon.

All in all this was a very simple pattern, that yielded quite outstanding results.

Thursday, January 19, 2017

Not all sewing projects are created equal.

Sometimes despite the best of intentions and efforts sewing projects just don’t work out the way you want.  It is ok to admit that the reality of a garment does not always measure up to the soring expectations of the dream.  My family and I moved a few months ago from my mothers place to a place of our own.  All our stuff came out of storage and is currently sitting in the back room.  Sufficed to say that the new place does not have nearly as much space as the old place and we need to cut down our crap and as a result I have been going through a lot of sewing stuff.

This is why I have re-evaluated my stash, which is quite sizable and why I am having to reconsider my wardrobe, including handmade items and eventually when I get to those boxes my costume collection too.  I can’t keep everything and in having to make tough choices I am also having to face the reality that there is projects I should never have kept, they just weren’t good.

Some of these cock ups never made it to finished product because I realised part way through that it just wasn’t working – but at the same time for some insane reason I have kept it part finished, collecting dust and taking up space.  The perfect dress is a good example of this.  It sits there hem not done and in no way on earth that it will ever fit me.

Others I did get to the end of, possibly I was even delusional and proud of at the time.  Take for example this 1960’s shift dress.  


I remember that I really liked the bust shaping in the pattern and the back belt.  But the material, a cotton sateen, is all wrong for the dress.  The shaping that I loved in theory in practice was nigh on impossible with my skill level at the time to get even and neat.  The fit is just all wrong and whether that is my body shape or my sewing skill or the fabric weight or a combination of any or all of these things is still a bit of a mystery.  I do remember that as the pattern is for a 32.5 inch bust I had to add 3.5-4 inches and used the slash and spread method, which always has varying degrees of success.


Thing is we often share our success with pride but rarely do we share our failures with each other – which in some ways seems backwards as you learn far more with failure.  When we do find a shared failure  it is often masked behind a don’t recommend pattern, as if somehow all the issues are someone else’s fault.  So this post I dedicate to owning my own shit and my own failings, accepting that I can do better and I will do better and clearing out all the rubbish that just didn’t work.

The unsalvageable will be going in the bin and the unwearable either following suit or facing major modification to be wearable.  Like the boxy dress.  I used a good cotton for the spotted skirt but  mixed that up with a cheap crappy cotton for the top – what a rookie error.  I intend to remove the bodice re-gather the skirt on a waistband and turn the unflattering dress into a very flattering skirt.

For so long I have been far to passive about my work, it really isn’t good enough.  Not because it is bad but because I could do better, with a little more patience and planning.  Its often small things, the finishes where I am lacking.  Failing to clip in or iron fell as I go.  Failing to clip off the excess strings at the time I finish each one rather than trying to find them all at the end.  Rushing a zip in rather than taking the time to iron them open and get the seam right in that line.  Like this 60’s tunic style dress, which is made entirely out of cheap shit polyester suiting.  This is the back of the neck where I have never dealt properly with the zip, and the bottom of the zip that isn’t correctly fitted into the dress, and the pockets being poorly placed, and, it can’t be ignored, completely overlocked in white thread. (Sorry I can't for hte life of me remember which pattern I used)


Near enough I have always treated as good enough, but after a year where I could not wear much of my handmade clothes I am looking back at them with a different eye.  I don’t want to be seen in a lot of them – how embarrassing that I did wear them in public.  Its not all bad news though, some of them I still love, many I just can’t bear to part with even though they don’t currently fit me.  In better news I am shrinking post having my son – and by shrinking I mean I am 10kg down from my pre pregnancy weight so maybe someday soon These beauties will once again see the light of day. 


Until then I promise to be more honest with myself in assessment of my work.  With any Luck the next time I fail to meet my expectations it will not be because I didn’t try my best.

Wednesday, January 18, 2017

A Look back at my Victorian Past Part 2 – Angela’s Dress

I love this dress, so much so that I am considering making one myself – I do have a plethora of emerald/forest green velveteen to use.  The one thing that holds me back is that it wasn’t the easiest pattern I have ever worked with.  Having said that I learnt a lot.


You may be asking why Ange didn’t make her own damn dress.  Well you must remember that this was some years ago and Ange was still my young apprentice at that time.  She certainly helped a lot, and probably could have managed a Truly Victorian pattern without to much issue but this is Ageless Patterns (#1478) and even for me who never really follows pattern instructions it was really hard.  We had much resizing, reshaping, and Ange even suffered a 7 day lemon detox and super tight laced corset in order to get into it.  It was a team effort because truly one person could not have suffered the frustration alone – no matter how beautiful the final product is.

I should explain that people did not have much choice in their Victorian costumes.  I did all the research bought all the patterns and assigned to each person based on what I thought would suit them best.  What they did have a say in was materials because they bought and paid for all of that.  However from the moment I saw this dress in black and white line drawing I just felt it was a deep green dress with cream inserts.  Lucky for me Ange agreed and that was what we went looking for.

She ended up with some sort of man made fabric, like a taffeta but a really cheap one.  From memory it cost about $4/m which was lucky cause that train required a lot of fabric.  The underskirt and front bodice were a cream fabric, something like a crepe I think with a stretch lace overlay.  A stretch lace that still sometime haunts the corners of my worst sewing nightmares.  The bodice was finished off with some hanging beads for some added bling.

Like I said in Part 1 – Ageless patterns are not made to be easy, they have not been resized to adhere to modern figure standards and the instructions are close to non existent.  This dress being simple, at least came with everything I needed to achieve a close to image look without to much sewing training.  In the end we not only resized pieces but also added in another two panels in the centre front.  To give you an idea of how out of modern proportion this pattern is the bust after resizing down/up would fit 36-38 inches whist the waist was 26 inches.  Yes this pattern is made to fit the proportions of a barbie doll.

As I mentioned the stretch lace was a nightmare but did add a certain bling to the final product so it was probably worthwhile in the end though “stretch lace” as a general term was added to the ever growing list of banned material.  At least the scalloped edge meant that I did not have to hem it.  All other material was fine to work with and the bodice pieces were also flatlined with the denim, again this was lucky because it meant that even if Ange didn’t technically fill out the bodice once corseted to the level needed for the waist – she at least looked like she did, since the denim held its shape.

Like I said once complete this was one of my most favourite of the Victorian costumes and I really should give it another go sometime and see if my  resizing ability has improved.

Tuesday, January 17, 2017

A look back at my Victorian past Part 1 - Hef's Costume

I realise that this blog has exclusively featured my fashion projects.  This isn't so much by design as that the blog started after I had moved out of costume making and into vintage fashion sewing.  See I used to make costumes for role playing LARP and so when I stopped doing so much LARP I also stopped making costumes.  There is actually a wealth of costumes and fashion projects that haven't made their way onto this blog for one reason or another and I intend to catch up on some of them in the coming months, starting with the Victorian stuff that I mentioned in my epic project post.

So why does one be so bat shit insane as to agree to make 6 full Victorian female outfits, 3 Victorian coats and 6 full pirate outfits all in the same few months - the answer is Role playing convention.  You have already seen details of Girlsquad's Marvel Costumes well the Victorian costumes were also for girlsquad.  Though we had already agreed to be pirates as the Con Costume, one of our favourite GM's was running a Victorian cthulu LARP and we had a reputation to uphold.

So With only about 2 months to get it all done I escorted my lovely ladies to Cabramatta in search of the right materials, ordered a bunch of patterns from Truly Victorian and Ageless Patterns.  Arranged sewing days and worked tirelessly to complete everything.

In this post I will cover the creation of the costume I wore


Bodice - Ageless Patterns #1442

This was the most challenging part of this project.  Ageless Patterns are truly vintage with little to no updating for modern terminology or fit.  I had to completely reshape several pattern pieces to make it fit my shape - the patterns original shape was that of full waist training.  I obviously altered a lot to work with what I had and the look I wanted, however many reviews will tell you Ageless Patterns do tend to leave the decorating up to you - that is the pattern included is only the base garment.  They certainly are not a pattern company for the novice or unadventurous.

Material used was some sort of polyester with a velvet burnout on it.  I had originally wanted a stripe but I saw this and thought that is exactly what I want.  I still remember it was $10/m a BIG spend for me in the days when I didn't ever spend more than $5/m.  The trim is a silk duponi that I got on MASSIVE sale because spotlight was moving to new premises.  I love the feel of the duponi and really wish I could afford to get more as it sewed like a dream and feels so luxurious.

The entire bodice is flat-lined in denim to give it enough body for the look - though there is a corset on underneath as well.  I decorating it with some hanging beads and there is a cameo on the front (photos to come once I find this in my storage clean out)

Skirt - Truly Victorian Fantail Skirt TV225

I love this skirt.  The pattern is so simple yet so effective.  Very few Pieces and came together like a dream.  It basically has a front panel, and side panels and inserted back panels that get pulled together with a drawstring to create the fantail shape.  I added horsehair braid around the hem and also added a dust cover to the train to try and protect the silk.

I can't recommend this skirt enough

Overskirt - Truly Victorian Split Pannier Overskirt TV328

I both like and don't like this pattern.  Firstly like the fantail it came together very easily and gave a good line to the natural form shape but on the other hand some of the gathering in the front seams were difficult to get sitting straight, though it may just have been the material I was using.  The Burnout didn't always drape perfectly.  I still think the final outcome looked good.

The last pattern listed is for the petticoat in which you will have to wait to hear - as I will document that as I finish the UFO that has been sitting around all this time.

I will probably add to this post once I have found the actual outfit and can take more detail photos.  But for now that's it.

The Most Epic of Major Project for 2017

So as I mentioned before I am going to be working on a major project this year.  A friend of mine joined an historical picnic society and has been working on a gown with pocket panniers – You know the ones where you turn sideways to fit through a door.  Anyway she has been posting pictures of her work in progress and working very hard on getting all the trims right and making it look fantastic and doing an amazing job given she is pretty much learning as she goes on a lot of the techniques.  Well Mel has inspired me to go back to my roots in sewing and make an epic costume.  Inspired also by a new friend who works in costume design and some of her amazingly professional work I have decided to revisit the Victorian era and create a costume from what I call skin up.

So what do I mean by “skin up”.  This costume is going to include, underwear, corset, bustle, petticoat, underskirt, Polonaise and hat.  The entire ensemble from the skin to what you see.  Some of this will be able to be made using stuff I have, the patterns are all taken care of, either I own them or in the case of the corset my costuming friend is going to lend a hand and help me draft up to my exact measurements.   So below is the epic nature of the vision I have with a deadline of July as I want to have a historical picnic for my birthday.

Unmentionables!!!!

Underwear – Truly Victorian Combination Underwear TV105
Owing to the hot Australian climate (even our cold is not really that cold by comparison to many other places) I have decided to make these in a lighter fabric.  Perhaps a lawn or a voile.  I will need to reinforce the button holes though, and I am undecided on whether I use the machines one step button holer or make bound button holes.  I will trim the bottom of the legs and the neckline with some cotton lace just to add a little bit of pretty.  Technically this is the first piece I need to create, realistically there is a UFO that may be finished first.  I bought this pattern when I made a whole bunch of Victorian stuff years ago but never got round to making it.


Corset – Pattern By friend.

As I mentioned a friend is going to help me with a personalised pattern for this.  For me this is important as every Victorian corset pattern I can find goes up to a DD bust at best and I am currently an F.  I am not entirely certain what fabric will be required but I assume I should be able to make it with a homespun backing, canvas internals with metal boning and taffeta as the outer layer of fabric.  I am hoping since I already have the canvas and taffeta.  As a side note the taffeta is literally the oldest piece in stash mountain dating from I believe 2004/5.  The canvas I bought when I made the Elizabethan ball gown.


Bustle – Truly Victorian Petticoat with Wire Bustle TV101


Again this is a pattern I have had for a while, I even bought the wires precut that TV sell to make this project easier.  I never did add all the ruffles at the back but for a while there I had a bustle.  My original plan was to dig it out and finish the ruffle bit but when I took it out the thing had gone a bit mouldy.  Deciding that this was actually pretty gross I harvested my boning and threw the rest in the bin.  In the remake I plan on using homespun as it has a good weight to support the wire cage but won’t be too heavy.  From memory the cage section may need to be reinforced and if this is the case I will use an inner layer of canvas and back that again with homespun.  I am going to do all the ruffles on it (bring on the ruffle foot that I will need to buy but I really don’t want to hand gather all of the stuff that will need to be gathered in this project).


Petticoat – Truly Victorian Petticoat TV170


So remember that petticoat that I had in the post about my UFO’s.  Yeah I am going to make use of it.  I bought all the stuff to make it for my friend when I made a bunch of Victorian stuff back in I think 2008/9.  I saw the dolphin lace that is on the bottom and as she loves dolphins I thought yeah I will make her that.  But in true Hef style I bit of a lot and had to chew fast (6 female Victorian costumes and 3 male).  This Petticoat along with one of the male coats and the combination underwear  got shelved in preference of having the externals finalised.  Well Now its time to bring it all back out.  Whilst as I said above the underwear should be first this is probably going to be the first finished because well its very much done, over half way I would say.  So the petticoat won’t fit in with the all white unmentionables but what is life without whimsy.
<>


The Outerwear

Bodice and Overskirt – Truly Victorian Polonaise TV410


I have made this pattern before for a friend in the great Victorian sewing extravaganza.  It is a very pretty pattern that is surprisingly easy to do.  I will poof it better for this one than in the picture provided as I am after a more early bustle look where as my friends was more late bustle.  I am thinking it will be a royal to navy blue though the exact type of material is still being considered, a lot will have  to do with costs.  Depending on the shade of blue I will trim with either red or maroon and white.  I want to have a double sided pleat around the base and neckline all the way around the bottom in white and a red strip running up the centre of that trim.  Whether I can get that done or not is another question.  I am going to also include a pleated undersleeve on the cuffs and I will use a silver button to finish it all off.


Underskirt – Truly Victorian Trained Skirt Ensemble TV208


I have made this skirt before too, but I did so in a cheap satin and even though it worked well it didn’t last long (it fell apart).  I know I will need to make some modifications to the pattern like I don’t want the skirt to be that long at the back or that full.  It may end up that I need to purchase the 4 gore pattern but if I can get away with this pattern I think why not.  The plan however is to have the dress a walking length, or at worst a s mall sweep train.  I am going to make the skirt in white and Homespun is likely, that way I can use the same material to trim the polonaise and the skirt so the white matches.  I will also do a double run of full pleated flounces at the bottom (hence to walking length) which will also have a red trim that matches the polonaise.

Adornments

Hat

So the final crowning glory on this outfit (pun intended) is to decorate a boater hat in floral and lace/ribbon.  This is going to be something new for me because I am not a milliner but also because I don’t normally finish outfits to that final detail and I guess I really want to see if I can do it.


Anyway that’s the plan, it is going to take a lot of work and attention to detail, I won’t be able to rush this the way I normally do and to be honest I don’t want to.  Wish me luck.