Monday, August 23, 2021

Its Been a While so lets catch up

 So I know I have not updated in a long time but in my defense I have been stuck in lockdown and homeschooling my son as well as looking after the baby.  We have had a sick rabbit and energy levels are just low.  I have not however been idle and much work has been done even though photographing it has caused issues, I literally have posts written with no pictures to add which is very sad.


In any case lets take a snapshot of what I am up to and what has happened with planned projects from April.

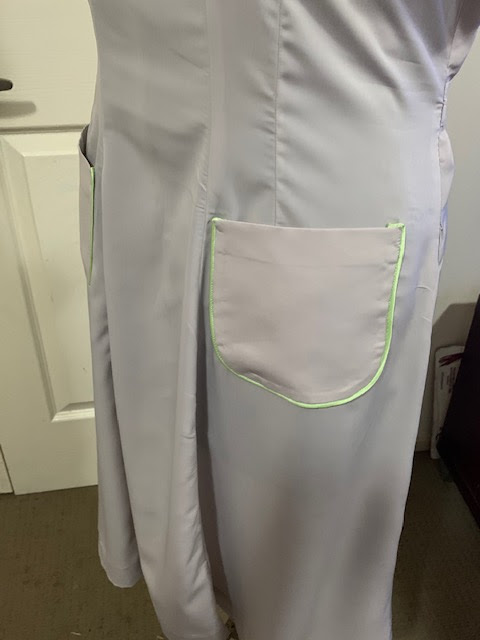
Project 1 - The Spotted dress 

This is done and dusted and I just need some photos of me in it, don't know how that will go now as I think I am about 10kg lighter than I was but worst case scenario I will just take it in, the construction is simple and I don't think this would be too much of a hassle.  

Project 2 - Renaissance Dress 

This became so much more than it ever was supposed to be.  I am very nearly done, in fact I believe I will get the last bit of velvet ribbon needed in todays deliveries.  Then it is just finishing the beading on one lower cuff and adding a few eyelets to lace the sleeve cuffs on.  For those of you who follow me on Instagram (angelic_cow) will have seen the progress unfold.  The beadwork got more and more complex as I found it was a good way to relax and pass time during the lockdown.  This dress truly has kept me sane.  I am hoping to have it done by the end of the week.  Photos may be boring and in my yard for now but I will hopefully be able to get to a cool location for shots soon.  (fingers crossed for high vaccination numbers by Septembers end)

Project 3 - 1930's Project

This one has a made skirt (though I will likely be taking that in as with the dress above) and the top is call cut out ready to go.  I have found it hard with the kids here to get time where the machine can be safely set up so most of the work I have been doing is the tracing/cutting/handwork as well as planning.  I will have to get this completed soon though lest it end up in the UFO box for another 10 years lol.

Project 4 - 1700's Corset

I am both sad and impressed that this project has had to be entirely shelved and restarted.  As mentioned above 10kg loss means this is less a corset and more a lose fitted bodice now so will need to redraft from the beginning.  I do have the supplies in stock now though to be able to move fast once I get to this.  I do think it would be best if it is the ONLY project I work on though from start to finish in order to keep momentum going, so on that I am waiting on the Renaissance and Hoop (below) to be complete.

Project 5 - Chemise Dress

This project is semi contingent on the above so won't move until I have the corset done and a few minor supplies (like the twill tap required for the gathering)

Project 6 - Hoop

I have (just in the last week or so) made some good progress on this.  The fashion fabric I wanted to use was not in large enough supply in the stash so I had to piece the bag with the fashion and white cotton sewn down the middle.  I am not up to the point of finishing up the bag when I realised I needed ribbon so bought that and hopefully I will see it this week.


Further Projects

My lovely family procured me 6m of Capulet silk from www,silkbaron.com for my birthday and I plan to make a late Victorian walking suit with it.  Obviously one does not cut into expensive silk without a trial so I have some very cheap taffeta on the way which will hopefully become a wearable mock up.  I am pushing this forward as the next big project to replace the renaissance dress once it is complete.

I also have the linen for the planned 18th century English gown waiting so that will need to be slotted in somewhere.  It will also be waiting on the corset however.

I have fabric coming to complete another Truly Victorian 101 Bustle for a friend which will take about a day or two based on the last one I made.  It will be Pink.

I also want to try a Victorian corset but figure I should wait until I have finished the first corset before I get too excited about it.


I guess all of the above should keep me busy at least until after lockdown.


Happy sewing peoples

Thursday, May 13, 2021

March Summation and April Plans

 Guess who didn't factor in school holidays for April.

As you can likely tell by the lack of posts I did not manage to finish anything at all in April.  I very nearly managed to finish the unfinished project but not quite (finishing it today).


What I did manage:

  • Drafted and pattern mock up for 1785-1788 corset from Stays and Corsets (volume 1) by Mandy Barrington.  I also managed to get the sized pattern cut out twice but did not get to sewing it together to create the boned mock up.
  • Traced the pattern for my renaissance dress, no more movement there.
  • Finished my unfinished brown floral dress that (surprise) does not fit me.
  • Traced and resized the pattern for the 1930's outfit but did not even get the trial cut out.
  • Discovered that the material I wanted to use for the hoop is just a bit to small, I have come up with a fix and even located more stash fabric to use but just never got round to more than that.

So yes the boy does suck a lot of time out of my life but I wouldn't have it any other way.  For this reason I won't be summarizing the projects as I did last month, its just a little too depressing.

However the Plans for May are already going well

Project 1
Blue and White spot dress, which is at time of posting this is already done but I do need some more time to get photos done (as the hat I wanted only just arrived)  however I can present this preview.


Project 2
Renaissance dress, I have prewashed the fabric and planned my cutting lay out today so tomorrow I should begin the actual process of putting it together.  I also received the last pieces for trims in the form of 3.8cm wide black velvet ribbon.  I was very happy to pick this up at about $3/m as its somewhere near $7 at spotlight.  As the ribbon I got is technically millinery it isn't as plush as spotlight but it will be beaded over anyway.


Project 3
The 30's Project, as per last month and as above.  I have the skirts pinned to a cheap rayon I have had laying around for ages so its just cut and size but this project may take a back burner to some of the others in this list as its probably the least exciting to me right now.

Project 4
My corset as above and last month.  I really want to get movement on this as I don't think it will take much more than a full day to get it done, again its a case of focus.  Perhaps I will pick a few days to dedicate to this and just knock it off.

Project 5
Chemise Dress.  I have the fabric and need the says finished but if I can't get it done in time for the white event I will use the swan maiden as a back up.  I would however really like to see this one complete as I think it will make a very pleasant addition to the costuming wardrobe.

Project 6
Hoop as above and last month.  I really do want it out of the strawberry fabric as shown in the previous posts but there isn't quite enough to do this.  My plan is to use the left over white cotton from the first project of this month and seam it together along the bottom rather than fold.  I hope this doesn't compromise the pattern but then piecing is period I hear.

I know that is heaps (with one already done) so hopefully I can get somewhere on something.  I have not allocated an unfinished project due to the fact that its demotivating to not have outfits finished that I can even get on.

Many of these are actually I think really fast to complete, its just a case of getting onto it.  The corset and hoop for example I think are both only a couple of days each, the 30's outfit is maybe one solid day of sewing, chemise dress may take up to a week pending drafting and what I choose to do about the hems.  I can see the bulk of the renaissance being completed rather quickly and the real time suck being all the decoration I want to do on it, which may push this out over another month or two.

hopefully by the end of next week I will have up the posts about the brown 40's finished project and the spotted dress as well as some more future plans for things I want to make that are still mulling around my head.

Saturday, April 3, 2021

March Summation and April Plans

 To be entirely honest I don't know how many people would even be interested in this type of post but it seems as good a place as any to start documenting how things have gone and where I want them to go so read on if interested and ignore if not.

March Goals

For March I was supposed to get done my Renaissance Dress and My Hoop, neither of which happened.  I did however manage to get finished two unfinished projects and a new 1920's 1hr Dress as well as complete the layover 40's dress from February.  I know that last one is technically not finished but buttons will happen when I find them and no sooner.  I also am most of the way through sorting out my stash and documenting what I have so that is another win.

Finished Project 1, was the 1950's dress which does not even come close to fitting right now but I do really like. Maybe by next winter I can get it closed.  In the mean time I shall have to find a way to pack up the stuff that doesn't fit me anymore or maybe I find a new home for it with someone who can zip it up.  What is certain is it feels good to be getting some of those lazy projects out of my pile.  

Finished Project 2, turned into an 1860's ish dress with a matching bonnet and a pleated underskirt.  The underskirt will be very useful as a petticoat for all my hoop projects though I will need to finish the hoop more on that later.  I was very pleased with the rework, more pleased than I was with the original design.  Having worn it today however I do think that the green dress needs something more on its hem, so whilst I am leaving it for now as functionally finished don't be surprised if it finds its way back for more embellishments.

New Project was the 1920's 1 hour dress for my niece.  This is the one that I am most happy with from this month probably because it caused me pain to get to where it was done but in then end was so pretty and worked so well.  I may tackle more 1 hour dresses in future.

Stash Fabric Used - technically I did get rid of 3m of satin though it was not used in a finished product it was attempt 1 of the 1 hour dress and we shall call it a mock up because it sounds more encouraging than a cock up.  Down side is that I did not really get through a lot of the stash in this month and instead did have to buy more fabric than I would like and should therefore plan for better busting projects moving forward.  I did use up some green ribbon, ivory ribbon and white cotton lace from the trim stash so that's something at least


April Plans

April has some must have plans as well as some desires.  Thanks to the cleaning out of my stash I have so many projects that I have remembered I have fabric for so I should see some stash busting in this month.  

Skills to work on include drafting my basic block using the corset and stays instructions (at this time) and attempting to fit that block for future use.  Drafting one stay or corset from the afore mentioned books and hopefully seeing that through to first mock up.  

Project 1 will be a 1930's ensemble for a party at the beginning of May.  I have had the fabric for a good many years now with this plan in mind so it will be good to get through that and also necessity for the theme of the high tea I am to attend.  It will need some resizing and fitting so I plan on actually doing this properly this time.


Project 2 will be the hoop, I know it needs to be done I have the fabric chosen pattern traced and just need a nice day to cut metal outside (this is not an inside task).


Project 3 will be the renaissance dress, there has been some start on preparations but long story short I have the entire requirements and will be need to start putting the dress together.  This may be a project over a couple of months because the embellishments are quite involved.


Bonus Projects wearable block dress based on the skills above, 1950's spotted dress, 1940's tropical crepe dress all of which fabric has been acquired for.  I also have earmarked an unfinished 1940's dress from late 2015 in my unfinished pile.

Thursday, April 1, 2021

Finishing the Unfinished - Big Green Edition

 Sometime in a January, I am going to guess 2019 because 2020 was a blur of nothing, I started sewing a simple dress of green cotton to wear to an event at the Australiana village in Windsor.  The idea was a rework of the pagoda bodice body, a semi-full skirt over just the petticoat with no hoop, long sleeves and the use of a collar I had acquired from the sewing basket.  I had planed it to button up the side under the arm and sized the whole dress to be able to be worn without a corset for the sake of Australian summer.


I got the outfit to the point where the hem was pinned, no buttons yet and no sleeves but I had handsewn in the collar, which I may add, was no mean feat.  Trying to get it pinned to lie flat on the bodice with it on me (Gladys is in need of repair so not really good for that sort of thing) was not something I wish to ever repeat - but I did get there.  All the internal seams were finished in a hand felled method or french for the long skirt seam (there is only one).  And there it sat.


From memory I had issues working out what sleeves I wanted then there was trying to get a sleeve to fit into the hole left by the drop sleeved style of the pagoda bodice, and finally the event ended up on a day I could not attend (the reason why escapes me as it was a date I had organised so all I can think is that a family event came up).  Then I sent Gladys for repairs (that never happened and took 9mths but that is a whole other story) so the dress came down was packed away and passed over for more needed or exciting projects.

This month we have an event on, open themed and I wanted to make the renaissance dress for it but the green dress made its way back up and into sorting as we move my stash from under the house into storage for mould reasons.  I took another look at it and thought it deserved to be finished - especially after the battle that was the yoke/collar piece, however the basic colonial style wasn't exciting me.  


First step was to put sleeves in and rather than spend weeks wrestling with patterning I decided to put the pagoda sleeves on.  I wondered if it would fit over a hoop (as that was also on my to do list this month) and a new plan was born.  Raise the hem, make a pleated petticoat to go underneath and fit over a hoop.  I added some stash cotton lace and ribbon to the sleeve ends to finish them nicely and balance the white portions.  Also yay some stash use.


I did not have the required amount of fabric for the petticoat, so I hit up spotlight for the first of about a million visits this month.  Cotton cost was high given the amount used in a hoop petticoat, plus the cotton needed for the pleats would make one very heavy petticoat.  Given my other petticoat is already out of a too heavy linen the idea of having both on my hips was not appealing.  In order to save money and in line with the "is it pretty" mentality I bought some $2/m poly/cotton poplin and a couple of meters of white quilting cotton (same quality as the green fabric).


As it turns out 2m was very ambitious as I worked out the pleat depth etc and returned the next day for another 2m.  I would need 12m total to make the 4m hem of pleats.  Setting the pleats I tried the vinigar methods and other than giving me a craving for chips it did not seem to help me much.  But giving them a good steam and basting has held them so far.  The dress hem ended up being lower than anticipated so I have kept a basting stitch above this hem to hold the pleats better.

When hemming the dress my original plan was to have about 10 inches of pleats showing, however that did not look balanced at all, so after consultations with friends it was decided to just about halve that, in the end its 6 inches from green to floor in hoop.  This is mostly eyeballed but i also used a 6" paper template to run under the green and make sure it was at least in the ball park.

yes this was to much pleats

One of the best secrets about this dress is the with the side closure I can line up a whole bunch of openings to be able to access my Bernie Pocket rather than carrying a bag.

I am very happy with the result and glad I took the time to reimagine and finish this project.


Keen eyes may have noticed a bonnet appear in the final photos.....I have considered a separate post but as the bonnet was made in one night I don't think I have enough to say to fill out a whole post.  


The basis was made from some fleeting tips made by Angela Clayton, and it is constructed with buckram and wire frame, padded with some quilted wadding and covered in left over cotton from the pleats and uses up a length of ribbon I had in my stash from gods know when.


I love the gather effect on the back though I have been told it looks a little bit handmaids tale so I may need to add more adornments before I wear it again.

Sunday, March 28, 2021

Because its the 20's - why not a 20's Dress

 The Historical Picnic Society Event for March is bring a friend.  I made it so, it is my fault but I do tend to call the first event of the year bring a friend every year.  As such I asked who wanted to be my friend.  My niece, Tayla, very quickly volunteered.


I asked her what she wanted, suggested I could do a quasi medieval dress, Regency or 1950's all of which I could pretty easily throw together in the time I had.  She countered that she could do 1940's or 1920's.  Having been binge watching Closet Historian I immediately thought ahhhh the 1 hour dress and plans for a 1920's began.  Should be simple but for those who have read my previous posts nothing is ever easy when I get involved.

The one hour dress is an easy draft, for full explanation here is where I got my instructions.  Basically take bust measurement plus ease make rectangle half this wide and as long as you want the dress, add some arms and expand at hips to make an I shape.  I however thought ohh the hanky hem that would be great.  Yeah ballsed that one up when my side triangles were like tiny little spikes instead of long billowing hanky hems.  After two days of attempts to fix and trying to reimagine how to add panels to create not only what I wanted but something that was even wearable I decided it was just not pretty.  I wanted my niece to have a nice dress not some frankensteined messed up rag.

yes the first attempt was indeed this bad

I bit the bullet hit up spotlight (again visit 50 this month I am sure) and discovered to my delight a 40% of apparel fabric sale.  This meant that I didn't have to buy the cheap winston or plain satin and suddenly could afford the beautiful Satin Rayon - so pretty, so slinky, so arsie to sew I will never again taint my sanity with its luster.  To accent I found an almost perfect colour match lace.  Armed with these purchases I returned home to complete my 1hr dress.


Personal side note I did this dress in its entirety, including all planning, patterning, draping and adornments in one afternoon from about 10am to 4pm with an hour or so of breaks to pick up my son and the repeated interruption of a baby and a 5 year old (post school).  Do I think it is possible to make a 1hr dress in an actual hour... yes I do.  But it would need to be made out of cotton/easy to sew fabric, have no extra trims or finishes.  I may one day challenge myself to do so.  This one however with lace inserts and neckline belt and bow in slippery fabric was not going to behave in such a manner as to make a 1hr finish possible.


I am actually really happy with the finished result.  I don't think some of the inserts or collar are professionally finished but I also don't think Tayla will care - she isn't going to be wearing this to her wedding. 

Tuesday, March 23, 2021

Finishing the Unfinished - Blanket Dress

 So this is the first in a series I will be calling finishing the unfinished.  To qualify as a UFO the item has to never have been completed to the point of wearable.  In future I will take photos of how close they were but for this one I will just have to be descriptive.  I call this project The blanket Dress.


Date Started: Circa 2011-2013

Date Finished: 22 March 2021

So with the window of a full decade this dress was left languishing because I was just generally unhappy with how it was going.  It got put aside and not picked up again until now.  The thing I remember not liking - the wonky front neckline.  It was left with all seams done except the zipper side including the lining inserted in the same state but the lining was missing a ruffle (not part of the original pattern - though then again neither was the lining).  

The Pattern was Vintage Vogue 2267 (Currently I believe out of print).  I (well we including Ange) were going through a big 50's phase buying up all the vintage reprint patterns we could get our hands on.  Its not the most exciting vintage pattern but I do like the faux princess line (I say faux because it does have side bust darts so its not entirely princess) and the softer 50's silhouette rather than the super full skirt more often found on these reprints.


The fabric I bought to make a Victorian bustle gown with, and yes I still have umpteen meters of it.  I think it cost a couple bucks a meter in Cabramatta and was a few years owned by the time I made this dress.  The thought was that it would be a warm winter look because the fabric is a very loose weave and very thick fabric.  I like warm.  The loose weave however also made it terrible to cut and sew hence the weird front neck angle. (yes it can not be unseen).


It was dragged around (2 moves) and eventually the cut and overlocked poplin pieces to create the ruffle were misplaced.  The bulk of the dress was located again when my friend and I were organising my sewing stuff and she suggested it was so close to done that I should take a look at it.

It required at that stage: Zip and side seam, ruffle and hem.  Time to complete if I have worked on it non stop probably one afternoon.


Will I use it: Unlikely - 2011 was not just 10 years but also 2 children ago and alas I even tried a corset to get into this for photos and the universe is not favouring me on this one, so Gladys got spiffied up to show off the finished product.


I am proud of how I got my zip in, it is pretty invisible and should be given that it was hand basted, then hand sewn then machine sewn in just to keep the fabric from shifting.  The ruffled under petticoat lining is great for holding the dress in a nice shape without being too over poofed and it styles well with the shirt here.  However that neck still bugs me senseless.  I could given the masses of this fabric left try again in a bigger size, with the experience I think I could generally have this dress finished in a week including taking time to fit the pattern to me (would need resize and FBA) and all finishes, the hem for example was measured from the waste and hand basted before being hand stitched down.  It is a very uncomplicated pattern.  I am unlikely to do so however - at least not with this fabric.  I do think I would like a similar style for my wardrobe but I don't have the patience to try lining up these stripes so we will see if I do find a fabric to inspire me.  I actually think this would look really good with a matching coat, the pattern does have a matching bolero but that isn't as winter friendly.

Now its done I need to decide what to do with it - do I hold onto it in the hopes that I can get small enough or do I send it to a new home?

Sunday, March 21, 2021

1940's Crepe De Chine Dress - Final

It sounded so simple right, a commercially available multi-sized reprint of a 1940's pattern.  I have made tones of 1940's dress, most of them requiring resizing from something crazy like 30" bust.  A week tops right.  Enter Crepe De Chine....


I bought the Crepe de Chine (polyester) from Pitt Trading in a remnant bundle 3m for $5 - who can say no especially when one is already paying postage for other fabric.  It was a soft dove grey colour and reminiscent of a dress worn by the mother in the queens gambit.  I had the pattern already in mind and crepe de chine is one of the suggested fabrics.  Tick and Tick.


I actually didn't even need all of the 3m which was fantastic, I started strong trying to do all the things - bar a mock up because how do you make a mock up for something that literally cost $5 in materials? when the material is like water, so it isn't like calico is going to show you anything.  Having made many patterns from the big 4 companies I already knew that the vast majority fit fine if I make a size 16 front and a size 14 back, I just cut and go.  But I did baste my curves and corners, follow the pattern instructions (for a little bit anyway) and I piped pockets and collar,  I lined up all my notches you know all the things you should do but I rarely do.  As photo below yes I always trace my patterns.


So prior to major construction all my pieces looked fantastic.  Pockets attached ready to go the first issue - a narrow bias cut strip sewn into a tube turned out and cut into 6 equal peices to form button loops.  Once sewn I could not get that thing to turn for love nor money.  No worries, take the second one (cause I cut it on the fold) and sew the tube by turning in both sides to the middle then folding down the middle and sewing down the upper edge.  Except Crepe de Chine slides more than even satin, its like as slippery as a bathroom floor after a 5 year olds shower.  So even ironed the strip was too narrow to keep even no matter how many pins it had. 


Ok lets just try and use the best bits, again the slippery nature of the crepe meant I couldn't sew them in the right shape and before full meltdown tantrum could ensue I made the decision that I would create thread loops for the buttons and quietly congratulated myself for such a smart idea.  But was it smart ... indeed it was not, as one can not work out how big the loop must be for the buttons when one has not chosen the buttons.  More on that later - the button loops were sewn further down the process so we will come back to that.

My next issue, why did I decide to come back from almost a year off sewing and make a dress with a round yoke that calls for not one but two 90 degree turns to create the front seam? oh that's right because I am a masochist.  This is I think the pinpoint of where things really started going south for this project and I started giving up on it.  I could not get those turns in.  Maybe in a cotton but not in crepe de chine.  They ended up slightly rounded and not entirely symmetrical but I could not even anymore.


At this point I sewed up my side seams and pinked (as was my chosen method of finishing) and cut through a seam..... because that's something I do.  Never mind it's low so that can be an issue for future hef when she works out the hem.  I tried it on and pulled together the opening where the zip would go and oh god it looked yuk.  Like gab on every single lump and post pregnancy bump possible gross.  It just didn't fit.  And at this point I stopped caring and my brain wandered further and further to the future projects and my sewing time spent on Bernie.

As February closed I realised I had to get this done.  Even if I called it an almost wearable mock up I just had to do it.  There could be no more adding to the UFO's and my self imposed February 28 deadline had come and gone.  I pulled it back out hung it up and assessed.  It needed, zip, hem, button loops, buttons and a good iron.

So in an effort to finish I created the button loops first, yes before I had chosen buttons.  And yes that is as stupid as it sounds.  Next was zip, I hand basted then hand sewed and then machine sewed this in - overkill perhaps but I wanted to make sure there was no slip on that seam.  Once hand sewn in I tried it on again and was pleasantly surprised.  It didn't have that loose fit as patterned but it didn't look bad, well not unfixable by the wonders of elastic slips bad anyway.  Then it struck me I had given up for dead before the race was run.

Lesson Learned - keep an open mind until all hope is gone.

For all its evil the crepe de chine does have a fantastic drape, a soft floaty feel and almost zero fraying.  So it isn't all bad, I think if I use it again I will just have to hand baste the entire seams to ensure less slip.


I am really happy and proud of the way that the piping turned out and the dress is really lovely.  Still needs buttons but I am having issues finding the matching lime colour and I am in no rush so I will keep looking.  All in all it turned out really nice, like everything it isn't perfect but it is wearable, feels beautiful and has far more right than wrong.


Tuesday, March 16, 2021

Is it Pretty? - Finding my sewjo and finishing the unfinished

 Last year was a great big giant sewing rut.  I fell pregnant in January and was sent home to lockdown in March and was unable to return to work in office before my maternity leave.  Quite literally I spent about 8 months sitting on the lounge doing nothing much.  It was not good for me in many ways and was likely not that different to most other people given the global shitstorm. 

Normally I would have spent time sewing but the pregnancy was quite demotivating, I didn't have anywhere to go and anything I made would be useless now, may not fit later etc etc so why bother.  New year came and the competition for Foundations revealed reinvigorated me and now I am overflowing with plans and ideas.  

Slowly the sewing supplies are making their way back up to me from under the house, organisation was happening but sewing, well not so much.  There were setbacks with the 1940's dress I had started not turning out as I had imagined, everything was just a lot.  Then in my procrastinating binge watching of you tube I came across the closet historian and this video. I don't think the closet historian could have imagined what effect the small intro to this video would have on me and most specifically one question.

IS IT PRETTY? 

A lot of my procrastination happened because I want it to be perfect, but it doesn't have to be perfect,  does it?  It just has to be pretty (to me, beauty is after all in the eye of the beholder).  Does it matter if it has a zip instead of hooks and eyes - no because its pretty.  I don't want to wear costumes because they are historically accurate, reenactment isn't my thing.  I want to wear costumes because they are pretty.  I want to make my own clothes because they are pretty and if I stop trying to fulfil the self imposed accuracy to historical standards I could concentrate more on the modern technical skills such as fitting, drafting, designing.  Those things will make my stuff  more pretty not hand felling the internal seams.

So today I did something I haven't done in about 2 years at least - I got out my overlocker (serger for those who know it by that name).  Is it historically accurate as a means of seam finishing ? - nope.  Do you see it? also nope.  And it has the major benefit of being quick and easy. 

That's not to say I can give up on all hand finishes just that I can prioritise what will add to the aesthetic and what is just being finicky for no personal gain.  Sure there are those out there to which the historical finishes are super important, and that is what makes them happy but I won't find my happiness in their pursuits - and you may not find yours in mine.  Find what satisfies your own desires and follow that path.

So with this new motivation I have hit the ground running and am on track to complete 2 unfinished projects this month.  One a 50's dress that was started probably 8-10 years ago... sat unfinished and unloved until this week when I inserted a zip, added an internal ruffle and now am left with just a hem.  Oh and a diet because it doesn't quite fit me - sorry if those pics end up being on Gladys.

I have also redesigned a costume from January of 2019 taking it from "colonial" to "gone with the wind" using mostly stash.

The 40's dress just needs buttons, though I may need to provide the post for that before I add them as I am yet to find ones that will work.  Lime green buttons are hard to find.

I have also traced out designed and prepared for the making of the renaissance outfit which I am dramatically calling Juliet in mourning... despite it not being black. 

I doubt I will finish all of this for march but I will have the two UFO's over and done with I am sure and that feels like an accomplishment.

So though you are likely to never see this My thanks Closet Historian, your work has refocused my joy.

Monday, March 8, 2021

Procrastination or am I just being organised

 So technically by now you should be seeing the finished 40's dress from February but alas it remains unfinished.  There are several reasons why I have procrastinated but I will save those for the next post which should be the finished dress (hopefully by the end of next week, I am so close to done).  This post is less about why I am procrastinating and more about what I am doing instead of finishing the 40's dress.

Well for those who have been on the instagram (angelic_cow) you will have seen I have been collecting the necessities for the next big costume a renaissance inspired simplicity pattern I have been dreaming of for about a decade.  I have only some velvet ribbon to source and I will be good to go and expect to start this week.  

However, the major procrastination project has been to get all the textiles we have stored under the house and move them to a safer storage facility.  This was pushed by the removal of a cot and mattress last month from storage under the house and discovered the mattress was moldy.  Queue concern for my entire fabric stash.

I could have just brought up boxes as they were and moved them to storage but that would not be procrastination, and so I decided to catalogue and re-organise the entire fabric stash.  To be fair its been a long time coming.  My reasons to do this now is that the bulk of the fabric was being stored in large 120 litre tubs and I can not move them.  Worse I can not convince my husband to move them.  So those big tubs are being broken down to smaller tubs that can be easily managed.  Secondly as previously mentioned I need to work on clearing out the stash and so I need a way of knowing what I have.

I have previously planned out this sort of thing even started big spreadsheets of length, width, thread count, ideas for it, cost of it and so on..... and on.... and on.  This time I have decided to keep is simple and I am finding that I am getting to the bottom of things rather quickly.  I am recording no more than the length and width with a small swatch carefully measured and cut.  Nah, just kidding I'm hacking off from scraps or selvage edges at random. I was smart enough that I have recorded the measurements in lead pencil so that if I use some but not all I can just change the measurements to what is left.  I used a hard cover notebook that my husband had laying around.  Because it is a cleaning out kind of time, so use what you got right?


As for the organisation on the other side, I am trying to some extent to group fabrics in some way so each box can be labeled.  It started more simplicity with just costume, children's and wearable fabric but I have since expanded to having a specific suiting and wool box, because as it turned out for that box I could be more specific.  I have not referenced the box to the book as yet since I assume I will end up resorting at different times.


On top of all this I am (gasp) getting rid of fabric I don't think I will use.  Yes I know I will have a use for it about a week after getting rid of it but at the same time I do just need to cut back on some things.  At this stage using only stash fabric I could continue to create well into my 80's and much of it is not a good quality fabric.  Do not fear though I am not sending this to landfill and if a friend doesn't take it I will drop it off at the sewing basket to support Achieve Australia.

I estimate maybe another 4 or 5 boxes of various sizes exist under the house so this project may go on until the end of March, but once that's done I guess I can start re-organising trims and notions. 

Anyway with luck I will have the 40's dress up next week and have begun the hoop and Renaissance projects of March even with all the organisation.


Friday, March 5, 2021

Feeling the 18th Century Bern.... Or Making Bernie Sanders Pockets


Ok so it may seem like a random combination but really was there anything safe from the insertion of Bernie Sanders and is rocking mittens? 

For anyone who hasn't been following and missed it (don't know how you could have missed the Bernie Meme but found this blog but who am I to judge), a photo was snapped of Bernie Sanders at the Biden inauguration looking so very Bernie with a pair of the most awesome warm gloves known to mankind.  Queue the internet photoshopping Bernie into anything and everything, Bernie himself printed the image on jumpers and sold them to send proceeds to Vermont Meals on Wheels.  Jumpers sold out almost immediately.  

Now maybe one day I will make a post about politics and costuming but for now let me just say the TL:DR for that post would be Hef believes that political discourse is not a requirement of costuming and would therefore prefer to keep the two separate.  Many don't and whatever you do you, but I don't costume for political reasons.  Having said that I can't say I am not a Sanders fan, despite being an Aussie and it having zero impact on my life.

So when Sewstine posted a video alerting me to the fact she had created a pattern for an 18th Century Pocket with the Bernie Meme on it I was on etsy faster than the road runner evading Wylie Coyote.  I purchased the hand embroidery pattern and as a complete noob just winged it.

I located in my stash a mid to heavy weight calico and purchased a cheap hoop and the cheap embroidery thread from Spotlight.  I decided Bernie wouldn't mind the utilitarian use of stash and cheaping out on notions so long as it got the job done. 


My method to transfer the picture from pattern to fabric was rudimentary and wrong, tracing the picture on tracing paper in pencil and then rubbing the pencil onto the material, this explains both the fact that Bernie is transfixed (faces the wrong direction) and the B and S at the top are not perfectly positioned.  The later happened because my method gave me a backwards B and S on the wrong side of each other - yes this is what tipped me off to the issue.  I did however keep the direction and just tried to reverse and replace the letters on the top.  I am not unhappy with my result but next time I'll tape to the window and trace directly to fabric.

I won't go into too much detail regarding how I stitched this since I am fairly certain I did it wrong, I did make a few artistic choices which deviate from the sewstine original design because it either was easier or seemed like a good idea at the time (lesson learnt future hef did judge past hef harshly for most of those choices).  It is basically a satin stitch on everything.  I will however note that I was very unhappy when i was stitching pants, but then when I got some distance to view it they became my favourite part of the stitching.


To finish it off I ironed on interfacing to the back of the stitched panel, no idea if this is what you are supposed to do but I figured since I wanted the pocket to be useable it would protect my internal stitches.  I then placed a second square of calico behind it and cut the pocket out of all three at once.  I returned to my stash to find a ribbon to edge with and though there were several choices (emerald green, grey blue, teal) none seemed right.  I decided that it was too fancy for Bernie, a man so practical that this meme exists at all, and decided to edge it with a simple similar toned bias tape and a democratic blue seam line to match the initials.


I first whip stitched the bias tape to the open slit to make sure this didn't get damaged in the process of sewing up the rest.  Call me crazy but my very careful external stitches look worse than my quick and functional internal ones... I think I need to work on my whip stitching.  The bias tape here got folded twice because well that S was placed to close to the slit and a full half width would have gone over its edge.  I think it looks fine though.


I sewed the top to be open as a tube to feed the cord (also from Stash) through that will then attach it to my waist.  Couple of knots later and he's done.

Is he perfect, no - but I think Bernie Sanders would appreciate the imperfections exist but not to spite the efforts made. In short I am very happy with my work here.


By the way for more regular updates I now have an instagram 

angelic_cow


come follow for the progress shots of these projects :)