Tuesday, December 15, 2020

Regency Ballgown - History and Planning

 Regency is a period most people are familiar with, if for no other reason than the insane popularity of Pride and Prejudice - or more specifically the Colin Firth one that made every history loving girl fall head over heals for Mr Darcy.  I mean why wouldn't you.

The fashion of the time was a nod back to the roman and Grecian styles.  The waistline moved right up to under the bust that also moved right up.  Skirts were narrow by comparison to earlier styles and the look altogether more sleek and less floofy.  The image of Regency is so engrained in our minds that we often don't realise the entire period lasted less than a decade (1811-1820 or the time in which the Prince of Wales ruled as Regent for an ill King George III).

Besides the cut of dresses the era is also known for its excess, whilst the Bennett's had their modest farm we must remember and picture the Netherfield Ball, or the sheer amount of food being brought into Netherfield on Bingley's return.  There was once an awesome show called Supersizers Go where they would live as in a specific era and the Regency episode is hilarious.  I recommend watching it. 

Regency is not a period I am unfamiliar with, I have made something like 10 dresses of this period all using the sense and sensibility series of patterns.  They tend to sew together very quickly and simply on modern sewing machines.  Though more so than any other era a regency stay of some description is required to get the silhouette correct - least you look more like a 70's hippy.  


So what has made this project jump the queue as it were, well Foundations revealed are running a competition.  The theme is Once Upon a Time and the idea being that you create a character.  I am happily using this as inspiration to get creative.  

So I selected my character, which in the end was harder than you would think - not only because there is so many characters to create but also because I still need to stick to the two rules - busting the stash and working on skills.  Regency was already on the cards and seemed to be the easiest to adapt to the theme set out.  By now you are probably thinking another Lizzie Bennet then but you would be wrong.  That would be far to easy (Plus I would do Mary she is way more interesting).  I decided I wanted to adapt the regency style to a character of folklore - The swan Maiden.  


The tale of the Swan Maiden exists across a number of cultures, however I was able to find published (at least online) tale and song for this which means (I hope) it will fit the boundaries set out by Foundations Revealed.  The basic premise of all stories is that a hunter sees swans land, shed their feathered clocks and transform into beautiful women who proceed to bathe then put back on the feathered cloak to transform back into swans and fly away.  Hunter steals cloak and blackmails swan maiden to marry him.  Eventually Swan Maiden finds clock and flies away.  Academically there is much discussion over the themes and tones in these folklores but really I just love the image of the transforming swan.

What I will need in terms of costume pieces

1. Feathered clock, of cause this would be the most important part though it is as yet only ideas in my head

2. White Regency Dress

3. Regency Petticoat

4. Regency Half Stays, which I already have done (thank the lords for small favours)


In order of priority though I will make the petticoat, followed by the dress and then the cloak.  I know this seems counter intuitive given the importance of the cloak but I can get the dress and petticoat done whilst mentally figuring out how I will do the cloak and what its design will be, and I can plan out the draping/pattern changes I would like to do to the dress while I work on the Petticoat.  Also as the petticoat is made up of mostly the same pieces as the dress its almost a wearable mock up to get my sizing right.

Skill wise I will need to draft some elements on the top of the dress which is quite new to me.  I have some ideas such as wanting slashed sleeves.  I also need a more mythical sort of look to the dress so design is obviously the biggest part of this project in general.  Again I will be concentrating on finishes (you will see this as an ongoing theme) with things like hand sewing and seam treatments and all those fun things.

Now to the important bit, the stash.  The bulk of this (the dress part) will be using not only stash fabric but entirely recycled fabric.  Early last year some friends and I were invited to inherit the sewing stash of a late dressmaker.  Within that stash was an unfinished wedding dress of white silk.  No one else wanted it because they would never finish the dress but I saw potential.  Specifically large panels of silk that could be repurposed to a new item - it was always earmarked for a regency dress.  obviously first step will be to get it out unpick the old dress and see what I have to cut from (I will try and get this done next week)

I may need to get some silk organza for some of the elements like the insides of the sleeves because I don't see the point of mixing polyester with silk, though the cape will likely be made from an polyester fabric that I also got from the same dressmaker because it seems like it would be financially problematic to buy a silk for the cloak and then in all likelihood glue feathers to it.  Though net may be a better option.  Again these are things I need to think about.  See why I am starting with a petticoat.

Tuesday, December 8, 2020

The Tram Outfit

 This outfit was actually made last year.  The Historical Picnic Society of Sydney was made aware that there was a celebration happening at the tram museum to celebrate 110 years (I think) of Sydney Trams.  This placed the opening to 1899 so we decided a suitable presentation should be attempted and on this day in 2019 we all assembled suitably attired.

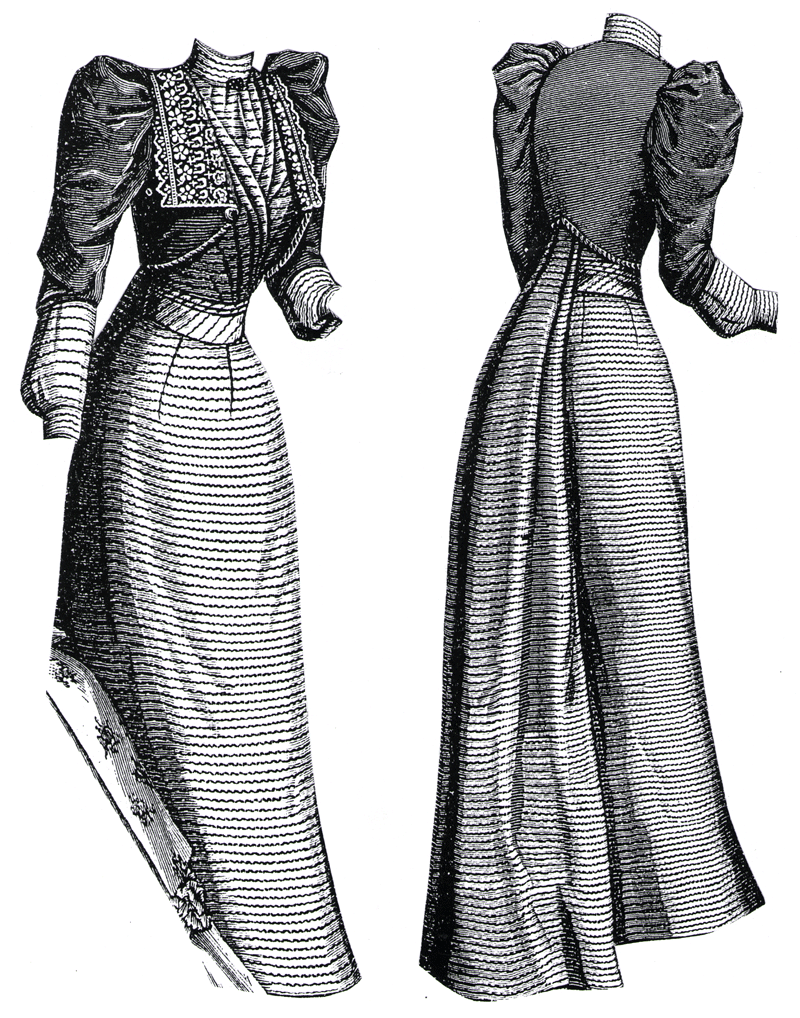
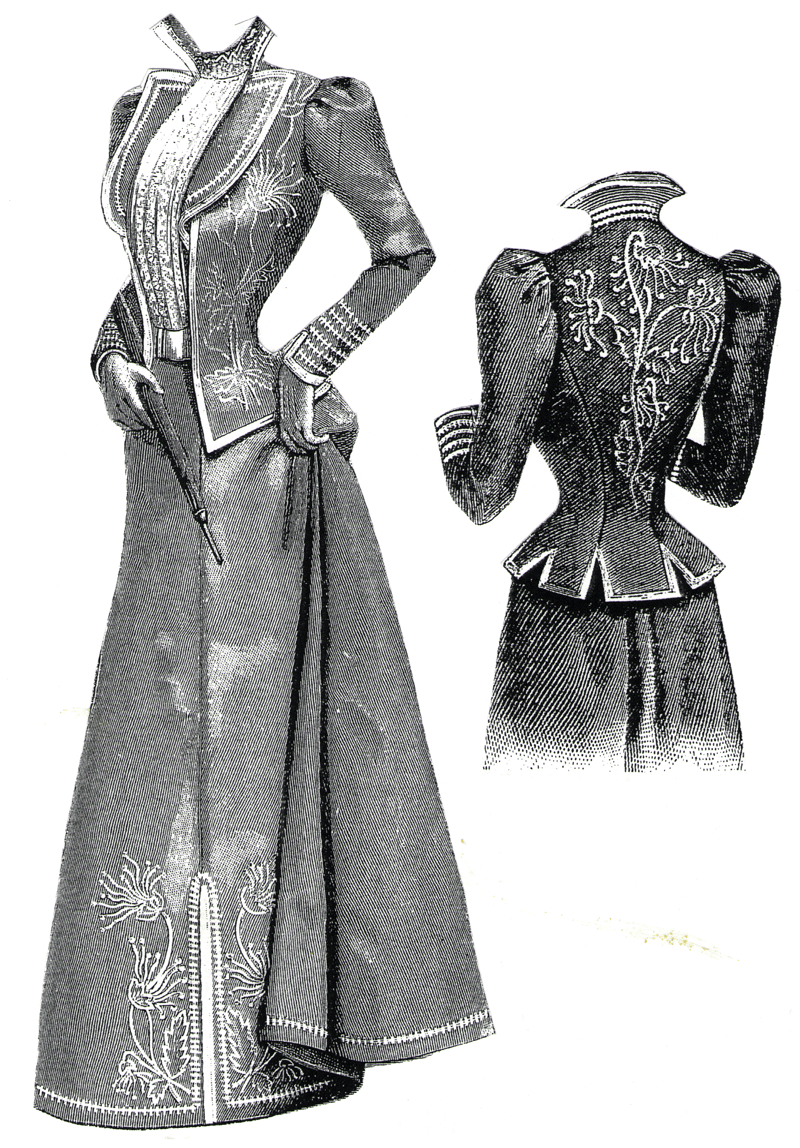
Originally I had bought a 1898 Ageless Patterns option in the strawberry Linen suit, however as deadline loomed I knew I would not have the time to do it the justice I wanted to that outfit.  For those who have not worked with ageless patterns before they are a reproduction of patterns at the time.  They give you the basic pattern pieces in whatever size the original is in and the rest is up to you.  I knew I would need to do a lot of resizing and refitting to get the result I wanted let alone the trim plans I had.

So with limited time left I turned to my trusty Truly Victorian stash of patterns and moved a few years post the trams opening to make the 1903 Plain Blousewaist (TVE41) and the 1903 Trumpet Skirt (TVE21).  For those who have not used Truly Victorian they give you for the most part the basic structure and you are able to decorate to your hearts content to create a variety of options.  Depending on fabric choice, trim choices and accessories you can obtain a large variety of looks.  I was aiming for Edwardian Middle Class woman on a day out.

For fabric I turned to E&M Greenfields, a Sydney store that supplies wholesale and also direct to public both online an instore with a large range of basic fabrics in a rainbow of colours.  Having been in there the range online is a drop in the ocean of what you can get in store especially in the trim department.  Being wholesale primarily if you don't order in large enough quantities there is a cutting fee and prices are not advertised but given by quote.  Having said that whilst the system is one step longer it really isn't complicated and their response time is amazing.  So is the cost. I asked for a quote on a yellow Linen (skirt) and white preshrunk Voile (top and lining).  

I don't remember the exact price I paid but the Voile was so cheap I thought why the hell not and bought the 15m that was the limit before another fee kicked in - I mean who doesn't need 15m of voile, I can use it for lots of things, anything, I live for voile.  


The outfit turned out ok I guess.  The skirt I love though I think I should placket the back opening and to be fair Linen whilst time period appropriate is a wrinkling nightmare, the yellow colour however I love.  The shape is very flattering I think.

The top however, I am not sure on.  I think I need to remake in something with a bit more body than the voile to be honest.  It isn't bad just boring.  Also I could be being tainted by years of watching Pollyanna but I feel it is very "pidgeony".  I did lower the neck using only the undercollar.  Having made the Train outfit previously with the full heighted collar I knew I did not have a graceful swan like Edwardian neck and ended up looking like a floating head.  This height turned out perfect for me and is finished with a tiny little ruffle of eyelet lace.  The same lace is backed on itself to form a double sided run down the blouse Centre.  Problem is none of these details really show up in the photos.

I topped it all off with a bought boater, found in the post Melbourne Cup sales (the only time to buy hats).

So what do you think, should I try the bouse again? If so what fabric should I use?

Sunday, December 6, 2020

Chemise a'la Reine - History and Planning

 The Chemise a'la Reine, which translates to "underwear of the queen" is a very simple but beautiful dress that had a small role in changing history.

At the 1783 Marie Antoinette dared to be shown wearing the lightweight, "peasant" style garment in a painting by Elisabeth Louise Vigee Le Brun. Whether it was because the queen was seen to be in underwear, or because the queen was appropriating or costuming outside her class is unsure but it caused a big stir within all classes of France. The disapproval was so complete that the artist repainted the queen using the same base in a more aristocratic garment and the painting was quickly swapped out.  


The damage however had been done.  While this garment is certainly not a deciding factor in the french revolution it was ammunition for those apposing the rule of Louis XVI against the already unpopular Austrian born queen.

Marie Antoinette is an historical figure whose existence is shrouded by her legend, her extravagant lifestyle, the infamous "let them eat cake", a far cry from the humble last words of "pardon me sir, I didn't mean to" (having accidentally stepped on someones foot on the way to the guillotine).  We as modern people are left to wonder what is true and what is propaganda.  What is fact without question however is that she was a very real human being, who's life and death was dictated by the whim of politics.  She died as a sacrifice to the revolution in 1799 less than a month shy of her 39th Birthday.

Despite the shock when it first emerged, and quite ironically the chemise a'la Reine was taken up by Josephine, wife of Napoleon first emperor of France and inspired the regency fashion that was to follow.

But I doubt you are here for a history lesson, its about the sewing right.  Well, this dress looks to be the first project I will kick off in 2021.  I have some very clear reasons for this.  Firstly having had a baby in October I am not in what one would call my perfect shape and the ease of sizing in this garment makes it perfect for both weight gain and weight loss.  Secondly the lightweight cotton fabric is great for Australian summers, and finally because I can wear this with or without underpinnings.  The true historical silhouette will have the stays but I would rather ease back into sewing with something a bit more simplistic than stays, that and I haven't yet found a pattern I would like to make stays for the 18th century.  I am open to suggestions on that.

Speaking of patterns, i will technically be drafting this one but it will be based on this pattern found online (so sorry but I can only find it on pintrest so if someone knows who should be credited I will be very grateful). 


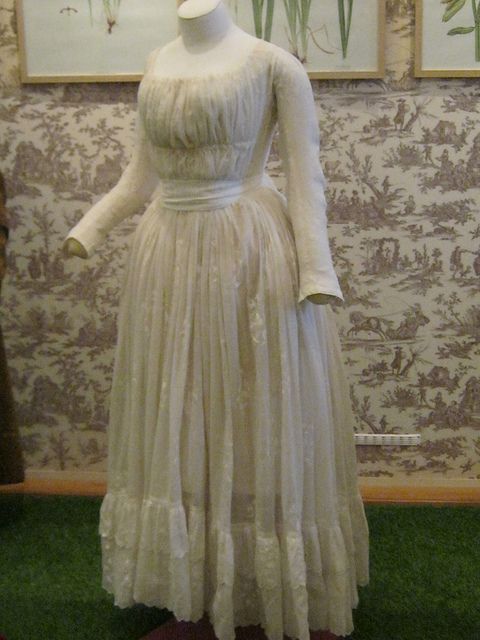
As you can see, it is a very simple pattern to work with, the entire dress is just masses of lightweight cotton pulled together around 2 drawstrings in the mid section and a further neck drawstring front and back with a separate shoulder piece added. The sleeves similarly are also shaped by either full gathers at shoulder or the drawstrings at elbow and lower edge.  This is to be in line with the image of Marie Antoinette.  If you are interested in making your own different sleeve treatments not only exist but are period appropriate like this extant example.


We can not see in the Queens Portrait whether her dress had the bottom ruffles but as I will include the neck ruffle I think I will go with a more plain hem.


So what we are up to now is how this fits into the goals set in previous post.

1. Challenging.

Whilst the dress is deceptively simple in theory in practice it requires meters and meters of hand sewn tiny rolled hems to be useful.  In order to achieve this the fabric must be cut 100% on the straight grain.  There is no near enough is good enough that usually tempers my efforts.  I will need to draw threads and cut precisely for this to not turn into a hemming nightmare.

Therefore the skills I am working on are being more precise in set up and hand sewing.

2. Stash items

For reasons that will be made clear in a future post this week, I am the owner of between  10 and 15m of white cotton voile that will be perfect for this project.

Need to source is only twill tape and silk ribbon.  Plus the hat stuff if I want to get the right Marie look, though I may do headwear slightly less formal than the portrait above

2020 - Realisations/2021 - Goals

 As the hell year that was 2020 comes to a close I find myself very inspired to get a whole bunch of sewing done in the new year.  How much I get through is questionable as I will be on a year of maternity leave so finding a balance between parenting, housework and sewing may be hard.  

I also have 2 goals to work on sewing wise this year, they are

1. Increase skills by working on more elaborate and complete pieces

2. Work through stashed fabric and notions

The first goal is logical, we only get better if we challenge ourselves.  The second has a sad but kind of inspiring story attached.

At the beginning of 2020, my mother passed away.  She was young at 66 and it was an unexpected loss.  I won't go into large details but sufficed to say as she was also a sewist and as I am the only relative who is also a sewist, I inherited a large amount of sewing stuff.  It is also probably relevant to point out that we were also both kinda low key hoarders with a special interest in sewing stuff, so stash mountain has turned into stash Everest.

I did let a lot of the stash go, donating to The Sewing Basket or to family friends who were making large numbers of masks given the situation with Covid.  In truth there was no way I could ever consider being able to get through it all.  But there were many many fabrics I kept, so many of them purchased with plans to make things for her grandchildren - a task I will try and complete in this year coming and others fabric she had had for a long time.  Fabric she found and liked and would use one day but never got the chance.  Perhaps the right project never did come up or perhaps it did but what if she lost weight (she was always trying to lose weight) or what if she found something more perfect to use it on.

I think we all have a stash like this, we end up buying fabric specifically for projects rather than using what we have and a lot of what we have could have been used but its like deciding between having your cake and eating your cake.  What I realised in all of this was cake is no good if you don't eat it.  Eating it is its purpose, having it is a waste.  So 2021 needs to be the year I realise the perfect project is the one I have now not the one that may or may not exist in the future.  That silver and grey brocade I have been holding onto for nearly a decade, the vintage fabrics I found at fairs all of it is useless unless I use it.  I don't want to hold onto it and then miss my chance.   

With that all in mind I have started making lists of ideas on what projects I could conquer in 2021 - Assuredly I will not get through all of this but the priority is that each project must meet both goals.  I will list them here in short form so that I can refer back to it when I finish one and move onto another.  Some of these I will expand on in planing posts so that I also have an easy reference place for all my research.  (List is being done in chronological groups)

Please feel free to comment on what projects you think would be most fun or that you would like to see or hear about.

Medieval

  • Viking Apron Dress
  • Tudor Catherine Parr 
  • Italian Renaissance Gown

1700's

  • Robe a'la Francaise
  • Robe d'Anglaise
  • Slytherin Riding Habit
  • Chemise a'la Raine

1800's

  • Regency Silk Ballgown
  • Scarlett's Orange Mill Dress
  • Linen Walking Ensemble

1900's

  • WW1 Era dress
  • 1920's daywear
  • WW2 Military Suit
Non Costume Sewing

  • Vintage inspired work pieces
  • Mums Children's wear
  • Baby Bix Baby clothing
Fixes and Finishes on old projects

  • Elizabethan Cartridge pleating
  • Cursed Green Dress
  • Blanket Dress
  • Plaid Dress
  • Toph's Victorian Coat

Monday, June 17, 2019

India Wilkes dress final

So I just realised I forget to post this one up .... after all that build up lol

Before I start I have been looking at my stats and seeing that there appears to be people all over the world you read this.  Weird feeling.  Out of interest please leave a comment about who you are and where you are from it would be nice to know who's connecting to this.

Anyway without further ado, and I believe there should be a post for each part so I won't go into to much detail in this one just an overview.  If I have missed any pieces I will go back and fill them in later.

The dress was a raging success though I am still on the hunt for a snood.  Below are some pics because I know when I am looking at blogs that's the main thing I am interested in anyway :)  Enjoy and remember leave a comment I would love to know what you think of my work.


Edwardian Madness - Ageless #1344

Ageless Patterns had a sale in April to celebrate their  birthday and I couldn't resist.

Firstly I was already looking at there patterns for an outfit for an 1899 outing in December and secondly I am a sucker for sales!!.  I end up with 3; #1315 from 1892, #1389 from 1898, and #1344 from 1912.


My original plan was to make the 1389 for a tram anniversary in  December and the others were just to make postage viable and take advantage of the sale.  However when a steam train ride to Kiama appeared on my Facebook feed and a friend in the Historical Picnic Society decided to organise the troops the 1912 jumped the queue.

Planning Process
This pattern says (and Ageless even checked there original for me) it is a 40" bust and a 27.5" waist.  I made up a trial knowing that I would not ever corset down to a 27.5 at the moment expecting to resize.  In the end it actually fit my 40"/30" amazingly well with zero alterations.  I can't explain this but don't look a gift horse in the mouth.

Ageless patterns do take more planning than many others due to the lack of instructions.  Ageless do not pretend to be anything more than a reproducer of the original pattern with original instructions.  Thus it is important to remember going into this that no one will hold your hand, "finish in the usual way" was a very valid instruction for the Victorian and Edwardian times when sewing was much more widespread and people just knew how to do those things.  Given that i rarely actually follow instructions this isn't a huge hindrance to me but I understand it may be to others.

These instructions seemed even more vague than usual, possibly as the original is in french and Ageless have translated as best they can.  Both English and French are included so if you do speak both perhaps it would be easier for you.  The biggest issue I had was was the closure none of those instructions made any sense nor did the pattern pieces that came intuitively give you a closure point.  Instructions say that bodice closes at center back, and that the first few buttons on the front are functional but with no center back seam on the skirt there was no place for the waist band to open.  I decided after consulting many online groups to add a center back seam and go from there.  This has worked though I can't say I am a fan of the hook and eye closure and will be de-historifying it with a button covered zip in the near future.

Another point to be aware of is that the entire over bodice is one huge pattern piece with some deceptively simple shaping techniques for the sleeves and the side seam. 


In short ease the dart in the sleeve part, sew small darts into the underarm/underbust/side seam area.  Line up sleeve ends and side seam bottom pull straight and sew one continuous seam. 


Took some fiddling but this was worked out in trial stages.  Not doing this will cause the arm to twist oddly.


Fabric Choice:
Knowing that this dress would be for winter - specifically for this train trip I wanted a warmer fabric than the suggested taffeta.  After much deliberation I decided that despite my wool allergy a wool or wool like would be best and due to the bodice piece issue a non plaid.  Any pattern was going to need to be small and able to conform to biases.  I thought and fiddled and searched until I happened upon a beautiful marle Oxblood mostly acrylic (yay for less allergins) from Pitt Trading.  I accented with tulle from stash, lace and velveteen from spotlight.  Lining is left over white cotton and white linen/cotton.

Buttons came from a shop in newtown that sells huge amounts of buttons in all shapes sizes and colours.  They are a black plastic with a little shine to them.


The Making:
This pattern (by fluke of fitting me) came together perfectly once I had worked out the few small issues - being the closure, the sleeves twisting and that I misinterpreted a pattern marking and cut off some of the left side skirt (yeah don't do that  - you will have to add it back later).

The fabrics were of little issue EXCEPT the tulle. It has gone straight onto the banned list and I will avoid it now like a creeper in a club.  I have to thank Angela Clayton for the inspiration to overdo the dicky adding both lace and pleated tulle.  Undeniably it looks fantastic, but it was a nightmare to control and still is.

Horrible pleating tulle
But soooo pretty

So without further ado here is the pictures of the finished dress beautifully backdropped by vintage trains.


As a side note the hat was also made - I will eventually do a post on that too - another credit to Angela Clayton.

Saturday, October 27, 2018

Forward Planning - Or how do I make room in my stash for better fabric.

Well it is the night before the big unveiling of the India Wilkes dress, It sits still incomplete (I have to do the sleeve epaulets) which I will work on tonight once my little man goes to sleep and tomorrow I will get some photos to be able to do a big review of the project and probably some individual pieces going into more detail on the bodice and the skirt.

In any case the time has come to start thinking about what to do next and I think it is time to focus on some smaller scale, more usable on a daily basis pieces that use up stash fabric.  We lovingly refer to my stash as stash mountain and you can see the beginnings of it in previous posts (years ago) and the fun thing is that most of that fabric is still around..... and it's found friends along the way.

On top of the stash is unfinished projects, many that will be abandoned to time and waste due to size changing, needs passing or it just being a project that didn't work.  However in the interest of motivation I am below posting some of the ideas that I have.

Starting with an unfinished project;

the 40's floral

Most of this dress is done, I started it about 3 years ago because it was just after my son was born.  It is actually the third time I have worked with this full pattern not including when I turned the bottom half into a skirt.  Obviously I love this pattern, the fall and drape is beautiful and flattering.


I halted because as you can clearly see on the picture the front is not symmetrical and I somehow managed to cut the front right piece the wrong way.  Stupid right - yes very, especially the 4th time you have done it.

The material I had gotten on sale for $10/m and its a faux silk satin that falls like water.  I loved the vibrancy of the colours.  Eventually and randomly as I had given up hope I did find more of the fabric and bought another meter but by that stage I had moved onto another project that had a more pressing deadline and then I just never picked it up again.  I deserves another look though


Black and White Gertie Pattern

I bought this black and white gaberdine in a big spotlight sale specifically to make this super sexy 60's ish number from Butterick's Patterns by Gertie Range.  I have never even traced the pattern.  Again this was just after having my son and I wanted to lose some weight, which I did but then with a baby didn't have time and since then I have put a whole bunch on again that I am in the process of trying to lose.  Life is a never ending desire to drop weight unfortunately.

I will probably look at this again for winter time next year, simply because it is a heavier fabric and more suited to the autumn winter seasons.  It will be great for work though


Red Rayon Pattern Copy

I have had this red rayon for a long time - it was bought when Spotlight had a buy the rest of the bolt for stupid discount and I was big in love with both the 40's fashions and the no iron properties of rayon. 

Red has always been a good colour for me and there was only a few meters on the bolt making it viable to buy and so it has sat ever since. 


This is another project that has sat around since my maternity leave.  I selected this pattern because could you ask for anything more perfect for a red rayon than copying the dress on the pattern drawing.  I even remember buying black rayon for the neck though it would take a miracle to find that in my stash now.


The pattern is traced and that tracing "should" fit me now so I should probably prioritise this one even though the sleeves make more of an autumn winter number too the rayon means it shouldn't' be too hot.

1940's Blue Birds

This fabric has also been in my stash for a very long time.  It is a crepe that has zero body.  I bought it and another fabric which i made the first pattern mentioned on here out of.  The end result is a weightless beautiful drape, the work to get there though was a headache.  This slips and slides and does not like to behave.


I selected this pattern for it at time of buying and I have never changed my mind, but I would be lying to say that the creating those front gathers and curved seam in this weightless fabric is not intimidating.  Likely this is the reason I have never gotten around to this one.


It would make a very elegant summer dress though so maybe its time I grew some and cut into it.  I could always starch it first and see if that helps.  I will need to get lining though.


Random Shirts

So under this category I have a whole bunch of possible projects.  Maybe I need a day or a weekend to pump out all of them. 


The orange spot is a rayon originally purposed for a skirt but I think maybe a shirt would work better in my wardrobe - I have tones of skirts and dresses but few tops.  I just can't decide which pattern to use.  One of these or none of them.


I will be using the peplum with this Japanese lawn.  It was bought with that pattern in mind.


Outside of the above I have plans for two 1930's dresses, a 1940's military style costume, more 50's dresses and some wardrobe pieces.

But for now I better get to those India Wilkes sleeves

Happy sewing.

Monday, October 15, 2018

Buttons? Buttons? Who's got the Buttons?

At last count this dress will have over 90 buttons on it.  Most of them cloth covered and only 23 of them functional  These buttons (and the phone replacement issue) account for the delay in these posts.

The plan for the buttons included around 25 functional buttons for the front of the bodice, 20 for the sleeve epaulet detail (10 per sleeve), and 8 skirt epaulets with 7 buttons each for a total of 56 - 101 buttons in total (Plus what will be used on the under sleeves).

I wanted the functional buttons to be about half an inch, smaller for the sleeve detail - but the hardest to find would be the skirt buttons.

Anyway, I went searching for buttons online.  I could have gone to the local spotlight but there cloth covered buttons are expensive at $8 for 10, have crappy plastic backs and the size range isn't as extensive as I would need.

This brought but the next issue in the planning, how to attach the buttons to the skirt and not have them flop about, I wanted them to sit flat.  Shanks on functional buttons are both necessary but also get held into position by the extra material around the button hole.  Without a button hole it flops around which wouldn't work for what I was after.

So I found on ebay a listing that had not only metal backed cloth cover button kits but came in both flat back (for gluing on jewellery apparently) and shanked.  A bit more searching and I found the website I like big Buttons and placed an order. 

I decided on the small 12mm (25), for the sleeves, 15mm (25) for the functional buttons, and huge 1.5inch for the skirt (50).  I was able to get shanks only on the functional buttons and flat backs on the rest.  You may have noticed that I had to cut down the plan for the skirt buttons because they came in packs of 50 or 100 and I didn't want 44 unnecessary 1.5inch flat back buttons on my hands.  Seemed easier on the pocket and storage to cut down each epaulet by 1 button and only need 48.

There was only one issue with the delivery which is that one of my shank backs came shankless which cut down the number I had to work with by one.  Otherwise, service was fast, friendly and the website easy to use.  I also found that the smaller button sizes were smaller than I had anticipated.  I think maybe if you flattened out the metal circle it would measure 1.5cm but the front buttons came in more the size I wanted for the sleeves and the sleeves are tiny - but we make do and I don't think it will make too much difference to the final look

Then set about the epic task of covering these bad boys.  The process is long winded enough when you have 5 to do for a dress, 89 (as the final count was) took a long time and patience that I am not well known for.  But I did promise myself that I would spend more time and effort on the finer details of the things I make so  I persevered.

To cover the buttons, first I had to cut the circles out of the fabric - a process made slightly easier by spending the extra buck on the plastic sizing tool which provides an exact template of the size that circle.  Then you stitch a run around the circle, put it in the rubber setting tool, place the metal to cover in pull the stitch tight and then push the back in with the plastic finishing tool.  To make things a bit more secure I added some craft glue between the inside and the back.  Then I did this about 90 times.


Pro tip, the bigger the button the easier it is to get the back in.  For the really small ones I used a vice, for the really big ones my own hand strength was fine.

Once all done I attached the buttons to the bodice front the traditional way (shanked) though I screwed up on spacing and will have to redo them today :(.


For the Skirt Epaulets I sewed through the the fabric where it curls under into the button.


I will provide further details of the process of making the epaulets when I do the post regarding the skirt and the one for the bodice, but for now progress continues and with only a couple of weeks to go I better get back to it.


Tuesday, October 2, 2018

The Sound of Silence

I know I really should be posting some kind of update about now.  I even have the subject as my buttons have come in and I have spent time covering them and have reviews of the site I got them from but alas - I lost my phone this weekend and thus I have no way of documenting the progress

In related news I feel so lost without the phone, I can hardly remember life without a 24/7 connection to the world.  I can't count the amount of times in the last 3 days I have had a thought and reached to get my phone and look something up on google.

The positive is there has been little to distract me so I have had to focus on things like covering my buttons rather than procrastinating on whatever the weird ottoman empire game is that I had been playing.  I hope that in the next week I will have a temporary replacement in place.  Until then I may have so see if my husband can help out though his photography is a little advanced so I doubt he will be happy with my quick snaps

Tuesday, September 18, 2018

Little things for Little people

My mother and I have been considering and working for a while on the idea of making vintage inspired clothing for children.  We have a ways to go before we can do our first market stall and much planning but in the mean time I find sewing children's clothes to be fun and fast - a great deviation from the more involved projects I am working on.

There won't be to much information about the how's and why's of these few things I have made for friends but I thought I may as well share these with the world.


I am going to start with this one, which I call beach baby.  It was made for a friend who was pregnant at the time (that little girl is about to turn one) and I used a cotton spot that my friend had bought for me to make her a costume for stage.  I knew she loved the fabric, the stage, the show and the costume and so kept all the scraps to make her daughter an outfit.  Gave it to her at the baby shower and she cried.  Got to love pregnancy hormones.  I really liked the hat in this one - its a basic tulip pattern finished off with a matching daisy button and some crossgrain ribbon.


Also for the same friend, this one was using a quilting cotton (what a dream to work with good quality cotton) in a vintage blue striped floral print.  The lace was used to decorate the costume I had in the show.  I think this one turned out with the most vintage feel.  You will also see a pattern emerge of nappy covers, nothing cuter than some little matching pants.


This one is the most beautiful delicate pink fabric with a sweet bunny print, also a quilting cotton and finished with a cotton lace.  All the above are lined in lawn.  The Hat for this one didn't turn out as well as I would have hoped.  I love the gathered brim but I must have misjudged the seam allowance on the crown because it was tiny.  I think the very tiny baby only ever fit it once.  Again same friend but no special meaning other than I liked this pink.


This one was started for a friends child's first birthday, but I accidentally made it 18mth size and then didn't finish in time anyway.  These friends a huge supers fans so I knew Wonder Woman would be a hit.  The birthday was last December, the friends received the finished piece a few months ago.  Basically when my sewing stuff was packed away it ended up a UFO and I only got it back out when doing some more stuff for a workmate.


I love this pattern.  I found with my son that there was very little sweet, vintage baby stuff appropriate for a boy.  I made this for another friends baby shower, she was having a boy and I felt the colours and style would work without being too out there.  Quilting cotton with lawn lining and simple brown buttons.


Also for my friends boy, overalls because who doesn't love overalls.  This fabric has a kitten drinking on it and I am especially proud of the button closures I did on the leg inseams.  I ended up using simple clear buttons here because I hate working with press studs and coloured buttons looked too busy.  The clear blends perfectly whist still being functional.


This is from an actual 1950's girls pattern.  I am yet to see this dress on someone and I would really like to because from here it is a little meh.  I think I am so used to seeing the shaping in women's 50's that I see a box with an unflattering skirt but on it would probably be very cute.  I also think it needs a ribbon which I still have not gotten round to getting.  I had this cotton in my stash for years, I bought it when I went through a phase making small things.  The post exists here somewhere and maybe I will even link it one day.  It is a cheaper quilting cotton from spotlight that was on sale for probably $5 and I don't think this even took a meter to make.


 This psychedelic spot number is so cute.  One of my workmates was going to be a second time grandma and so I made three outfits for her.  She has told me this is her favourite.  I can't remember but I think I also added the lace to the bottom of the tunic in the end but didn't get a photo.  Again quilting cotton and lawn, I kind of want to get this fabric again and make myself a shift dress.


This bunny fabric was so cute.  I used a white cotton to do the bust stripe and added some lace I had hanging around for literally over 15 years.  Still have some left too.  Instead of gathering as I did on the blue vintage one above I pleated to keep bunnies looking neater and it worked a treat.  I believe it was my first foray into pleating with a fork but I stand by the method 100%.  In the end I think it may have ended up a bit stark but at the same time I did photograph it on my work desk which is also white so I doubt that helped matters.


And lastly, of cause my pregnant workmate saw the bunny dress and being rabbit crazy was very jealous.  As I had some fabric left over (I bought 1m and got all this out of it) I decided to use up the excess on her.  I actually prefer this fabric in this more modern tunic style.  Not that the last one wasn't cute but I think the blue shorties break up the starkness of the white and black beautifully.  This one does still need buttons though.


I am sure there will be more to come in this category as I have about 5 more outfits already cut out.